It is time for me to share our secret recipe for the best baby back ribs ever. Are you ready? The secret is Newcastle! Yup, you heard right...
1 rack of baby back ribs
1 bottle of Newcastle
Sweet Baby Ray's BBQ Sauce
Pork Spice Rub (optional)
Preheat oven to 350 degrees.
Cut up rib rack into two to four pieces, depending on how many each person wants, it also will allow for the ribs to fit nicely in a 13 x 9 inch pan.
Pour entire beer bottle over ribs and bake in oven for 1.5 to 2 hours, until ribs are tender. You can test them with a fork.
Heat up grill to medium to high heat.
Coat ribs with BBQ Sauce and place on grill. Turn once the sauce has caramelized and you can add another coat, depending on how much sauce you want, we like tons!
If you want to add the spice rub for more depth of flavor, coat the meat before you coat with beer.
Live, Laugh, Love & Enjoy!
This post was not sponsored by Sweet Baby Ray's or Newcastle.

Monday, November 8, 2010

Friday, November 5, 2010
Contemplation
As you may or may not know, I am on a bit of a diet... That phrase might have been a little understated but I don't want you all to think I have gone mad and won't be able to post any more delicious recipes because my new goal is how to make healthy delicious, or give lots of goodies to my friends and family. It will be my new challenge and I am totally up for it!
Jose has been on a healthy spree for the past 5 weeks and so I figured it was my turn to hop on that bandwagon. Almost two weeks in and so far I have lost four pounds and I am in my craving stage. If you aren't familiar with dieting or forget what its like (so jealous of you!) then usually within weeks two through six, the dieter typically will start craving everything and anything that may have been favorites or just ok but are now banned, until things get under control. What am I craving today? Buffalo wings... the craziest thing is that previously I just thought they were "ok", that is until I couldn't have them :/ Oh well, two more months of this and as long as I continue to work out I can have 'em again!
You may think I am crazy for trying this around the holiday season and I know, it is crazy. Timing was just right so I thought, why not? Also, the Real Age web site has been bugging me and I realized that I don't feel my age, but I was starting to look it. If you know my family, you will know that I have been gifted to be a part of a genetic chain that doesn't age very quickly, thanks Grandma Jo Hanna and Grandpa Wes! If you were to meet my uncle you would not guess his age, I would bet $20 on it. He has more energy than I do and he is twice my age. Check out: Real Age and see for yourself how old your body really is... I went form 27.5, prediet and exercise, to 22.5, yesterday. Now I know 27 is my real age but who honestly wants their body to be aging at the rate or a little faster than their real age?

Live, Laugh, Love!
Wednesday, November 3, 2010
Cream Puff Cups
Hello all! Recently I have been in the competitive spirit. As you may or may not know, I "heart" Paula Deen! I think her cooking is real American and I love that she loves butter just like me! In fact I think using olive oil in place of it can be horrendous and I'd rather have nothing at all... Just my thought :)
I frequent Paula's website and have been noticing the ad from Philadelphia Cream Cheese about a contest for recipes. Since I was young, haven't entered a contest, mainly because I am afraid of losing, silly I know. So I decided to make a leap for it.
This happens to be the last week for this competition and each week has a specific theme. This week's theme is Desserts - Make To Impress. I thought that maybe I could do this but wasn't sure what to enter. I decided to review the other entries, my competition, and see if it was even worth it. You can view the other entries here.

6 oz Philadelphia Cream Cheese
1 cup powdered sugar
½ tsp vanilla extract
1 cup heavy whipping cream
1 tsp grated orange zest
2 sheets frozen puff pastry, thawed
1 egg
1 tbsp water
16 strawberries
8 sprigs of mint for garnish
1. Preheat oven to 400 degrees
2. Lay out puff pastry sheets and cut into four six-inch squares, it doesn’t have to be exact.
3. Lay each square over cup in muffin tin and work into the cup. There will be about one to two inches of edging.
4. Combine egg and water and whisk until combined to make egg wash.
5. Brush pastry top with egg wash.
6. Bake in the oven for 15 to 20 minutes or until the edges are a deep golden brown and puffed up.
7. Remove from muffin tin and let cool.
8. Combine Philadelphia Cream Cheese, sugar and vanilla and beat until smooth in appearance.
9. Add whipping cream and beat until stiff peaks form.
10. Fold in the orange zest until combined, don’t over mix, and set aside.
11. Slice strawberries in four and reserve the middle two slices for garnish.
12. Wash and dry mint sprigs, clip off the end bunch of about four or six leaves, whichever you prefer for decoration.
13. Fill a pastry bag or Ziploc bag with the cream cheese mixture and pipe into the cooled pastry cups.
14. Garnish with the strawberries and mint bunches.
Note: The parts of this can be prepared in advance but do not fill the pastry cups until a couple hours prior serving; otherwise the pastry won’t be as crisp.
Live, Laugh, Love & Enjoy! (And wish me luck!)
I frequent Paula's website and have been noticing the ad from Philadelphia Cream Cheese about a contest for recipes. Since I was young, haven't entered a contest, mainly because I am afraid of losing, silly I know. So I decided to make a leap for it.
This happens to be the last week for this competition and each week has a specific theme. This week's theme is Desserts - Make To Impress. I thought that maybe I could do this but wasn't sure what to enter. I decided to review the other entries, my competition, and see if it was even worth it. You can view the other entries here.
Many of you may think I entered a cake, but no I didn't :) It is a make to impress and I can only use ten ingredients or less. You would be surprised at how hard that can be. My entry was at exactly ten ingredients and I could of had more but I adjusted. This recipe was inspired by one of my favorite bloggers, The Girl Who Ate Everything and her Strawberry Cream Puff Cake, however, mine is definitely different.

Cream Puff Cup
6 oz Philadelphia Cream Cheese
1 cup powdered sugar
½ tsp vanilla extract
1 cup heavy whipping cream
1 tsp grated orange zest
2 sheets frozen puff pastry, thawed
1 egg
1 tbsp water
16 strawberries
8 sprigs of mint for garnish
1. Preheat oven to 400 degrees
2. Lay out puff pastry sheets and cut into four six-inch squares, it doesn’t have to be exact.
3. Lay each square over cup in muffin tin and work into the cup. There will be about one to two inches of edging.
4. Combine egg and water and whisk until combined to make egg wash.
5. Brush pastry top with egg wash.
6. Bake in the oven for 15 to 20 minutes or until the edges are a deep golden brown and puffed up.
7. Remove from muffin tin and let cool.
8. Combine Philadelphia Cream Cheese, sugar and vanilla and beat until smooth in appearance.
9. Add whipping cream and beat until stiff peaks form.
10. Fold in the orange zest until combined, don’t over mix, and set aside.
11. Slice strawberries in four and reserve the middle two slices for garnish.
12. Wash and dry mint sprigs, clip off the end bunch of about four or six leaves, whichever you prefer for decoration.
13. Fill a pastry bag or Ziploc bag with the cream cheese mixture and pipe into the cooled pastry cups.
14. Garnish with the strawberries and mint bunches.
Note: The parts of this can be prepared in advance but do not fill the pastry cups until a couple hours prior serving; otherwise the pastry won’t be as crisp.
Live, Laugh, Love & Enjoy! (And wish me luck!)
Saturday, October 30, 2010
Halloween Treats
Being on a budget can make things difficult for my creativity but then I realize, it is only a challenge and I can make it happen! So for our pumpkin carving party I decided to make sugar cookies, since we also have ample amounts of candy for all to pick at. I really like the sugar cookies that come in the gift baskets but I think sometimes they can be a bit dry. I tried this new recipe and I love it and so did JL who claims to "not be into sweets". He can deny it all he wants but when I make a really good dessert he just can't seem to help himself :)

Sugar Cookies (like the gift basket ones)
Sadly I don't know where I got this from but thank you!
1/2 C + 6 T butter, I used salted
3 C + 3 T all purpose flour
1 C superfine sugar, you can toss some regular sugar into a food processor to make it superfine
1 large egg
1 t vanilla
Frosting
Adapted from All Recipes, Submitted by JB BOX
1 C powdered sugar
2 t milk
2 t light corn syrup
1/4 t vanilla extract
food coloring
Live, Laugh, Love & Enjoy!

Sugar Cookies (like the gift basket ones)
Sadly I don't know where I got this from but thank you!
1/2 C + 6 T butter, I used salted
3 C + 3 T all purpose flour
1 C superfine sugar, you can toss some regular sugar into a food processor to make it superfine
1 large egg
1 t vanilla
- Cream together butter, sugar and vanilla, just until it is creamy, don't over mix!
- Beat in egg until well combined.
- Add flour until a non-sticky dough forms.
- Knead and separate into two portions.
- Roll out in between two pieces of parchment or wax paper and let cool in the fridge for 15 to 20 minutes, until firm.
- Remove from fridge and cut into desired shapes.
- Bake in the oven at 350 degrees for 10 to 15 minutes on a parchment lined cookies sheet.
- Slide paper off of sheet and let coo before removing them.
Frosting
Adapted from All Recipes, Submitted by JB BOX
1 C powdered sugar
2 t milk
2 t light corn syrup
1/4 t vanilla extract
food coloring
- Combine all but food coloring and separate into desired portions for coloring.
- Wait until cookies have cooled before frosting.
Live, Laugh, Love & Enjoy!
Tuesday, October 26, 2010
Chipotle Chicken
When trying to get creative with the ever-so-boring chicken, utilizing new or unknown ingredients can be the only way to go. Chipotle Chilies are smoked Jalapenos and delicious in almost anything, even mixed with sour cream for a creamy salad dressing. As spicy as jalapenos can be, the smoking of them can reduce the bite a little bit. The Adobo sauce they are combined with, typically, in the can is deliciously sweet and can balance out the spicy-ness, leaving the smoky jalapeno delectably savory and edible for this gringa (white girl)! If you like heat but never tried chipotle chilis, taste it and add as many as you want to the marinade. I didn't blend the ingredients but thinking back, that might have been a great idea!
Yummy Chipotle Chicken that you can use for tacos, burritos or salad.

Chipotle Chicken
Adapted from Simply Recipies
2 chicken breasts sliced in half or pounded
2 chipotle chilis, diced
Sauce from chipotle chilis
2 T lime juice
1 T canola oil
Sprinkle of salt
Marinate chicken in chilis, juice, oil & salt for 30 minutes to 1 day.
Grill chicken until done.

As you can see below, I make American tacos, versus the typical Mexican taco with onion, cilantro and salsa.
 Live, Laugh, Love & Enjoy!
Yummy Chipotle Chicken that you can use for tacos, burritos or salad.

Chipotle Chicken
Adapted from Simply Recipies
2 chicken breasts sliced in half or pounded
2 chipotle chilis, diced
Sauce from chipotle chilis
2 T lime juice
1 T canola oil
Sprinkle of salt
Marinate chicken in chilis, juice, oil & salt for 30 minutes to 1 day.
Grill chicken until done.

As you can see below, I make American tacos, versus the typical Mexican taco with onion, cilantro and salsa.

Wednesday, October 20, 2010
It is just beginning!
The past few months I have been making cakes for friends, and their family or friends. There was one period where I was making cakes every Saturday.
Jose and I have been discussing this and the opportunity that has become available to me/us... and Nessa's Cakes was born. I don't take any credit for the name, that was all Jose!
It is still incredibly preliminary and very under the radar so I have created a blog to give my potential clients a place to see my handy work and have a list of options available to them, from me :) The pricing of the cakes is based on the actual cost of the ingredients for me. This isn't a for-profit undertaking, in any way...
Long story short, here it is... http://nessascakes.blogspot.com/
Live, Laugh, Love & Enjoy!
Jose and I have been discussing this and the opportunity that has become available to me/us... and Nessa's Cakes was born. I don't take any credit for the name, that was all Jose!
It is still incredibly preliminary and very under the radar so I have created a blog to give my potential clients a place to see my handy work and have a list of options available to them, from me :) The pricing of the cakes is based on the actual cost of the ingredients for me. This isn't a for-profit undertaking, in any way...
Long story short, here it is... http://nessascakes.blogspot.com/
Live, Laugh, Love & Enjoy!
Tuesday, October 19, 2010
The best easy cake recipe ever!
I am going to share a secret with you... Some of the cakes I make are not entirely from scratch... I know, I know, it is preposterous and a shame but to be honest, most bakeries no longer make things from scratch at all. Not to mention, I have tried so many recipes from scratch but the best ones I have made require a box mix to use as a base.
This past weekend I had to make 40 cupcakes and a two layer 10" cake. It was a lot of work but the crazy thing was, I was able to finish it all in three hours, from start to finish! Even though I was using a box cake mix, the additional ingredients is enough to almost consider it a recipe from scratch.

The request was for chocolate and not too chocolaty (crazy, I know) cake/cupcake. So I decided to use this recipe from Our Best Bites.
Previously, I made the recipe for a friend and everyone loved it, including me :) I decided, why not try it with chocolate cake mix, instead of vanilla, for a not-too-chocolaty chocolate cupcake/cake. I decided to go with a vanilla butter cream frosting and for the cake I added a strawberry filling.
Needless to say, the cupcakes were a hit and I honestly think they were better than anything else I have made to date. They were super moist, surprisingly since cupcakes are hard to get moist, and they all had a dome top! I thought adding the extra flour and sugar would take away some of the chocolate but they were still pretty chocolaty.
The conversion for a chocolate cupcake is to use Devils Food box cake mix and instead of eggs whites you can substitute 3 large eggs. I don't like to waste eggs and since the only reason the recipe calls for whites is to keep the cake white, I didn't see the necessity.
To get a dome top on the cupcake, preheat oven to 400 degrees and right after you put the cupcakes in the oven and the oven comes back to temp, reduce the temp to 350. This may be a little annoying but it is soo worth it!
Live, Laugh, Love & Enjoy
This past weekend I had to make 40 cupcakes and a two layer 10" cake. It was a lot of work but the crazy thing was, I was able to finish it all in three hours, from start to finish! Even though I was using a box cake mix, the additional ingredients is enough to almost consider it a recipe from scratch.

The request was for chocolate and not too chocolaty (crazy, I know) cake/cupcake. So I decided to use this recipe from Our Best Bites.
Previously, I made the recipe for a friend and everyone loved it, including me :) I decided, why not try it with chocolate cake mix, instead of vanilla, for a not-too-chocolaty chocolate cupcake/cake. I decided to go with a vanilla butter cream frosting and for the cake I added a strawberry filling.
Needless to say, the cupcakes were a hit and I honestly think they were better than anything else I have made to date. They were super moist, surprisingly since cupcakes are hard to get moist, and they all had a dome top! I thought adding the extra flour and sugar would take away some of the chocolate but they were still pretty chocolaty.
The conversion for a chocolate cupcake is to use Devils Food box cake mix and instead of eggs whites you can substitute 3 large eggs. I don't like to waste eggs and since the only reason the recipe calls for whites is to keep the cake white, I didn't see the necessity.
To get a dome top on the cupcake, preheat oven to 400 degrees and right after you put the cupcakes in the oven and the oven comes back to temp, reduce the temp to 350. This may be a little annoying but it is soo worth it!
Live, Laugh, Love & Enjoy
Wednesday, October 13, 2010
Planning Ahead
This is not a food post but something very related to food and a normal person's active lifestyle.
I was inspired by Tina to share this with you...
About two weeks ago Jose and I decided, enough is enough. We are no longer going to be eating out during the week and will leave it to once a week, maybe. I then created a system to help the deciding of meals an easier task. This system I will share with you, you lucky person you!
First I created a weekly meal plan.
Monday: Fun meals (to make Monday seem less boring)
Tuesday: Home-cookin’
Wednesday: Mexican
Thursday: Italian
Friday: Home-cookin’
Saturday: Slowcooker/BBQ
Sunday: TBD (usually visit the "in-laws")
Then I started to brainstorm. I created a separate list for each type of meal and vowed to come up with at least eight meals for each. This meant that I would have at least 40 meals to make and as you may assume, I exceeded that.
Once that was done the rest of it was so easy and, may I say, enjoyable! All I had to do was decide which meal for each day and create a list.
Below are some ideas you can use for the meal types.
Fun food:
Chinese Appetizers
Tuna Melts
Bacon Wrapped Hot Dogs
Buffalo Wings
Home-cookin'
Chicken Pot Pie
Roasted Chicken with Potatoes and Carrots
Cream of Broccoli Soup
BLTT Sandwiches (add turkey)
Italian
Chicken Alfredo
Stuffed Shells
Cajun Fetuchinni (maybe not really Italian but to JL it falls under this category)
Mexican
Chipotle Grilled Chicken Tacos (recipe to come soon)
Enchiladas
Not-Chipotle Burritos
Chili Relleno Casserole
Slow Cooker/BBQ
Burgers
Pot Roast
BBQ Salmon & grilled veggies
BBQ Ribs
Hope this helps you get back into the healthy and more cost efficient way of eating and always enjoy what you put in your mouth!
Live, Laugh, Love!
I was inspired by Tina to share this with you...
About two weeks ago Jose and I decided, enough is enough. We are no longer going to be eating out during the week and will leave it to once a week, maybe. I then created a system to help the deciding of meals an easier task. This system I will share with you, you lucky person you!
First I created a weekly meal plan.
Monday: Fun meals (to make Monday seem less boring)
Tuesday: Home-cookin’
Wednesday: Mexican
Thursday: Italian
Friday: Home-cookin’
Saturday: Slowcooker/BBQ
Sunday: TBD (usually visit the "in-laws")
Then I started to brainstorm. I created a separate list for each type of meal and vowed to come up with at least eight meals for each. This meant that I would have at least 40 meals to make and as you may assume, I exceeded that.
Once that was done the rest of it was so easy and, may I say, enjoyable! All I had to do was decide which meal for each day and create a list.
Below are some ideas you can use for the meal types.
Fun food:
Chinese Appetizers
Tuna Melts
Bacon Wrapped Hot Dogs
Buffalo Wings
Home-cookin'
Chicken Pot Pie
Roasted Chicken with Potatoes and Carrots
Cream of Broccoli Soup
BLTT Sandwiches (add turkey)
Italian
Chicken Alfredo
Stuffed Shells
Cajun Fetuchinni (maybe not really Italian but to JL it falls under this category)
Mexican
Chipotle Grilled Chicken Tacos (recipe to come soon)
Enchiladas
Not-Chipotle Burritos
Chili Relleno Casserole
Slow Cooker/BBQ
Burgers
Pot Roast
BBQ Salmon & grilled veggies
BBQ Ribs
Hope this helps you get back into the healthy and more cost efficient way of eating and always enjoy what you put in your mouth!
Live, Laugh, Love!
Wednesday, October 6, 2010
Thanksgiving came early!
Well, not really. It sure smelled like thanksgiving when I was making dinner though! Dinner was roasted chicken with vegetables.

Roast Chicken with veggies
1 whole chicken, minus the neck and insides and rinsed
4 red potatoes, cut in 8 pieces
1 cup carrots
1 onion, roughly cut
8 oz mushrooms, rinsed
2 celery stalks, roughly cut
1/4 c butter, softened
1 t dried thyme
1 t rosemary
Salt & Pepper
Olive Oil
Cooking Spray
1. Preheat oven to 385 degrees.
2. Spray 9x13 roasting pan with cooking spray.
3. Combine butter and spices.
4. Place chicken in pan and run fingers under skin covering the chicken breast and legs.
5. With your hand, spread the butter under the skin and smooth out.
6. Place vegetables along the edges of the chicken.
7. Drizzle lightly with olive oil and sprinkle with salt and pepper.
8. Bake in the oven for 60 to 90 minutes, until the internal temperature has reached 160 degrees.
9. Remove from oven and let sit for 10 minutes to allow for the juices to redistribute.
Live, Laugh, Love & Enjoy!

Roast Chicken with veggies
1 whole chicken, minus the neck and insides and rinsed
4 red potatoes, cut in 8 pieces
1 cup carrots
1 onion, roughly cut
8 oz mushrooms, rinsed
2 celery stalks, roughly cut
1/4 c butter, softened
1 t dried thyme
1 t rosemary
Salt & Pepper
Olive Oil
Cooking Spray
1. Preheat oven to 385 degrees.
2. Spray 9x13 roasting pan with cooking spray.
3. Combine butter and spices.
4. Place chicken in pan and run fingers under skin covering the chicken breast and legs.
5. With your hand, spread the butter under the skin and smooth out.
6. Place vegetables along the edges of the chicken.
7. Drizzle lightly with olive oil and sprinkle with salt and pepper.
8. Bake in the oven for 60 to 90 minutes, until the internal temperature has reached 160 degrees.
9. Remove from oven and let sit for 10 minutes to allow for the juices to redistribute.
Live, Laugh, Love & Enjoy!
Thursday, September 30, 2010
Green Enchiladas
It seems as though I am on a roll! Let's hope it stays this way :)
Enchiladas are one of my favorite foods. When I go to a Mexican restaurant that is usually what I order, they never let me down.
My Mom used to prepare them at least twice a month when I was growing up so they are also one of my comfort foods. She would use the red sauce you can find in a can at the store and cheddar cheese, yummy!
My taste buds developed through the years and I decided to try the green sauce... Delish! Now it is one thing I make once or twice a month for dinner and we both LOVE them! They are great for leftovers and can be made ahead and frozen, just keep the sauce for the top separate otherwise the tortillas will soak it all up.
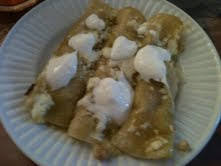
Again, sorry but still on the hunt for my camera battery charger, I will not give up!
Green Enchiladas
by, Me!
Makes 4 to 6 servings, depending on your hunger :)
24 corn tortillas
2 chicken breasts
1 package of queso fresco (or 3 cups shredded jack cheese)
1 large can of green enchilada sauce
2 small onions, halved & sliced or diced (your preference)
2 T butter
2 t chili powder
1/2 t garlic powder
Salt
Pepper
Corn or canola oil
1. Preheat oven to 350 degrees
2. Combine chili powder, garlic, salt & pepper
3. Place chicken in lightly greased 8x8 or 9x9 pan and coat with spices. Bake chicken for 20 minutes.
4. While chicken is baking, melt butter in skillet and add onions. Saute for 20 minutes or until caramelized.
5. While chicken and onions are working, heat oil in skillet or comal (flat pan with raised edges) until hot. Test it but adding a piece of a tortilla, if it sizzles, you are ready to go.
6. Place tortillas in oil and fry until they puff up but are not crispy, make sure to flip them. Drain off excess oil on paper towels.
7. Once chicken is ready, remove from oven and dice into small pieces. Add them to the onion and about 1/2 cup of the green sauce. Simmer for about five minutes.
8. Set up your assembly area. Remove cheese from package and set chicken skillet on the counter.
9. Grease two 13x9 pans and start rolling the enchiladas. Inside the enchiladas go some cheese and some chicken/onion mix. Make sure and not over do it on the cheese so you can have some for the top.
10. Once all the enchiladas are in the pans, pour the rest of the sauce over them and sprinkle remaining cheese.
11. Place pans in the oven for about 20 minutes or until sauce is bubbly and thick.
12. Remove from oven and let sit for a few minutes.
You are more than welcome to make your own green sauce, but as you can see these are pretty labor intensive so the canned version makes it just a bit easier.
Live, Laugh, Love & Enjoy!
Enchiladas are one of my favorite foods. When I go to a Mexican restaurant that is usually what I order, they never let me down.
My Mom used to prepare them at least twice a month when I was growing up so they are also one of my comfort foods. She would use the red sauce you can find in a can at the store and cheddar cheese, yummy!
My taste buds developed through the years and I decided to try the green sauce... Delish! Now it is one thing I make once or twice a month for dinner and we both LOVE them! They are great for leftovers and can be made ahead and frozen, just keep the sauce for the top separate otherwise the tortillas will soak it all up.

Again, sorry but still on the hunt for my camera battery charger, I will not give up!
Green Enchiladas
by, Me!
Makes 4 to 6 servings, depending on your hunger :)
24 corn tortillas
2 chicken breasts
1 package of queso fresco (or 3 cups shredded jack cheese)
1 large can of green enchilada sauce
2 small onions, halved & sliced or diced (your preference)
2 T butter
2 t chili powder
1/2 t garlic powder
Salt
Pepper
Corn or canola oil
1. Preheat oven to 350 degrees
2. Combine chili powder, garlic, salt & pepper
3. Place chicken in lightly greased 8x8 or 9x9 pan and coat with spices. Bake chicken for 20 minutes.
4. While chicken is baking, melt butter in skillet and add onions. Saute for 20 minutes or until caramelized.
5. While chicken and onions are working, heat oil in skillet or comal (flat pan with raised edges) until hot. Test it but adding a piece of a tortilla, if it sizzles, you are ready to go.
6. Place tortillas in oil and fry until they puff up but are not crispy, make sure to flip them. Drain off excess oil on paper towels.
7. Once chicken is ready, remove from oven and dice into small pieces. Add them to the onion and about 1/2 cup of the green sauce. Simmer for about five minutes.
8. Set up your assembly area. Remove cheese from package and set chicken skillet on the counter.
9. Grease two 13x9 pans and start rolling the enchiladas. Inside the enchiladas go some cheese and some chicken/onion mix. Make sure and not over do it on the cheese so you can have some for the top.
10. Once all the enchiladas are in the pans, pour the rest of the sauce over them and sprinkle remaining cheese.
11. Place pans in the oven for about 20 minutes or until sauce is bubbly and thick.
12. Remove from oven and let sit for a few minutes.
You are more than welcome to make your own green sauce, but as you can see these are pretty labor intensive so the canned version makes it just a bit easier.
Live, Laugh, Love & Enjoy!
Subscribe to:
Posts (Atom)