Tuesday, October 19, 2010

The best easy cake recipe ever!

I am going to share a secret with you... Some of the cakes I make are not entirely from scratch... I know, I know, it is preposterous and a shame but to be honest, most bakeries no longer make things from scratch at all. Not to mention, I have tried so many recipes from scratch but the best ones I have made require a box mix to use as a base.

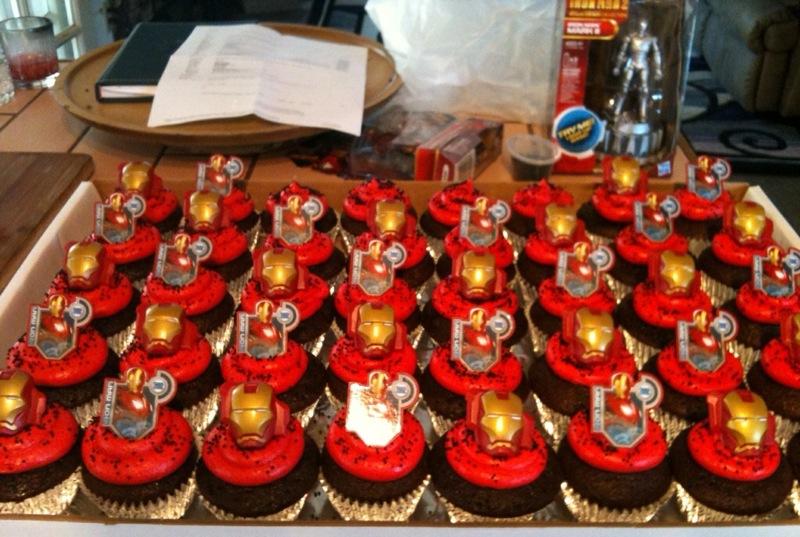
This past weekend I had to make 40 cupcakes and a two layer 10" cake. It was a lot of work but the crazy thing was, I was able to finish it all in three hours, from start to finish! Even though I was using a box cake mix, the additional ingredients is enough to almost consider it a recipe from scratch.


The request was for chocolate and not too chocolaty (crazy, I know) cake/cupcake. So I decided to use this recipe from Our Best Bites.

Previously, I made the recipe for a friend and everyone loved it, including me :) I decided, why not try it with chocolate cake mix, instead of vanilla, for a not-too-chocolaty chocolate cupcake/cake. I decided to go with a vanilla butter cream frosting and for the cake I added a strawberry filling.

Needless to say, the cupcakes were a hit and I honestly think they were better than anything else I have made to date. They were super moist, surprisingly since cupcakes are hard to get moist, and they all had a dome top! I thought adding the extra flour and sugar would take away some of the chocolate but they were still pretty chocolaty.

The conversion for a chocolate cupcake is to use Devils Food box cake mix and instead of eggs whites you can substitute 3 large eggs. I don't like to waste eggs and since the only reason the recipe calls for whites is to keep the cake white, I didn't see the necessity.

To get a dome top on the cupcake, preheat oven to 400 degrees and right after you put the cupcakes in the oven and the oven comes back to temp, reduce the temp to 350. This may be a little annoying but it is soo worth it!

Live, Laugh, Love & Enjoy

Wednesday, October 13, 2010

Planning Ahead

This is not a food post but something very related to food and a normal person's active lifestyle.

I was inspired by Tina to share this with you...

About two weeks ago Jose and I decided, enough is enough. We are no longer going to be eating out during the week and will leave it to once a week, maybe. I then created a system to help the deciding of meals an easier task. This system I will share with you, you lucky person you!

First I created a weekly meal plan.

Monday: Fun meals (to make Monday seem less boring)
Tuesday: Home-cookin’
Wednesday: Mexican
Thursday: Italian
Friday: Home-cookin’
Saturday: Slowcooker/BBQ
Sunday: TBD (usually visit the "in-laws")

Then I started to brainstorm. I created a separate list for each type of meal and vowed to come up with at least eight meals for each. This meant that I would have at least 40 meals to make and as you may assume, I exceeded that.

Once that was done the rest of it was so easy and, may I say, enjoyable! All I had to do was decide which meal for each day and create a list.

Below are some ideas you can use for the meal types.

Fun food:
Chinese Appetizers
Tuna Melts
Bacon Wrapped Hot Dogs
Buffalo Wings

Home-cookin'
Chicken Pot Pie
Roasted Chicken with Potatoes and Carrots
Cream of Broccoli Soup
BLTT Sandwiches (add turkey)

Italian
Chicken Alfredo
Stuffed Shells
Cajun Fetuchinni (maybe not really Italian but to JL it falls under this category)

Mexican
Chipotle Grilled Chicken Tacos (recipe to come soon)
Enchiladas
Not-Chipotle Burritos
Chili Relleno Casserole

Slow Cooker/BBQ
Burgers
Pot Roast
BBQ Salmon & grilled veggies
BBQ Ribs

Hope this helps you get back into the healthy and more cost efficient way of eating and always enjoy what you put in your mouth!

Live, Laugh, Love!

Wednesday, October 6, 2010

Thanksgiving came early!

Well, not really. It sure smelled like thanksgiving when I was making dinner though! Dinner was roasted chicken with vegetables.


Roast Chicken with veggies

1 whole chicken, minus the neck and insides and rinsed
4 red potatoes, cut in 8 pieces
1 cup carrots
1 onion, roughly cut
8 oz mushrooms, rinsed
2 celery stalks, roughly cut
1/4 c butter, softened
1 t dried thyme
1 t rosemary
Salt & Pepper
Olive Oil
Cooking Spray

1. Preheat oven to 385 degrees.

2. Spray 9x13 roasting pan with cooking spray.

3. Combine butter and spices.

4. Place chicken in pan and run fingers under skin covering the chicken breast and legs.

5. With your hand, spread the butter under the skin and smooth out.

6. Place vegetables along the edges of the chicken.

7. Drizzle lightly with olive oil and sprinkle with salt and pepper.

8. Bake in the oven for 60 to 90 minutes, until the internal temperature has reached 160 degrees.

9. Remove from oven and let sit for 10 minutes to allow for the juices to redistribute.

Live, Laugh, Love & Enjoy!

Thursday, September 30, 2010

Green Enchiladas

It seems as though I am on a roll! Let's hope it stays this way :)

Enchiladas are one of my favorite foods. When I go to a Mexican restaurant that is usually what I order, they never let me down.

My Mom used to prepare them at least twice a month when I was growing up so they are also one of my comfort foods. She would use the red sauce you can find in a can at the store and cheddar cheese, yummy!

My taste buds developed through the years and I decided to try the green sauce... Delish! Now it is one thing I make once or twice a month for dinner and we both LOVE them! They are great for leftovers and can be made ahead and frozen, just keep the sauce for the top separate otherwise the tortillas will soak it all up.


Again, sorry but still on the hunt for my camera battery charger, I will not give up!

Green Enchiladas
by, Me!

Makes 4 to 6 servings, depending on your hunger :)

24 corn tortillas
2 chicken breasts
1 package of queso fresco (or 3 cups shredded jack cheese)
1 large can of green enchilada sauce
2 small onions, halved & sliced or diced (your preference)
2 T butter
2 t chili powder
1/2 t garlic powder
Salt
Pepper
Corn or canola oil

1. Preheat oven to 350 degrees

2. Combine chili powder, garlic, salt & pepper

3. Place chicken in lightly greased 8x8 or 9x9 pan and coat with spices. Bake chicken for 20 minutes.

4. While chicken is baking, melt butter in skillet and add onions. Saute for 20 minutes or until caramelized.

5. While chicken and onions are working, heat oil in skillet or comal (flat pan with raised edges) until hot. Test it but adding a piece of a tortilla, if it sizzles, you are ready to go.

6. Place tortillas in oil and fry until they puff up but are not crispy, make sure to flip them. Drain off excess oil on paper towels.

7. Once chicken is ready, remove from oven and dice into small pieces. Add them to the onion and about 1/2 cup of the green sauce. Simmer for about five minutes.

8. Set up your assembly area. Remove cheese from package and set chicken skillet on the counter.

9. Grease two 13x9 pans and start rolling the enchiladas. Inside the enchiladas go some cheese and some chicken/onion mix. Make sure and not over do it on the cheese so you can have some for the top.

10. Once all the enchiladas are in the pans, pour the rest of the sauce over them and sprinkle remaining cheese.

11. Place pans in the oven for about 20 minutes or until sauce is bubbly and thick.

12. Remove from oven and let sit for a few minutes.

You are more than welcome to make your own green sauce, but as you can see these are pretty labor intensive so the canned version makes it just a bit easier.

Live, Laugh, Love & Enjoy!

Wednesday, September 29, 2010

Coconut Shrimp with Apricot-Ginger Dipping Sauce

I LOVE coconut shrimp. I really do... When JL and I go out to dinner I usually scan to see if it is available and then see that the price is ridiculous and opt for something less expensive. The real problem is that I know I can make it for a lot less so I think it is ridiculous to spend four times the amount. The recipe I make tastes a lot like the kind from the Yard House but I use a beer batter and they use panko.

I apologize for the quality of the pictures... My Nikon battery charger is MIA so for now I only have my phone camera.


Coconut Shrimp with Apricot-Ginger Dipping Sauce

Adapted from FoodNetwork

Ingredients

Apricot-Ginger Dipping Sauce:
1/2 cup apricot jam
1 tablespoon freshly grated ginger (or 1 t ground ginger)
1 tablespoon Dijon mustard
1/2 jalapeno pepper, seeds discarded, minced
3 tablespoons freshly squeezed lime juice

Coconut Shrimp:
2 cups sweetened shredded coconut
1 cup all-purpose flour
1 cup beer
1 tablespoon freshly squeezed lime juice
3/4 teaspoon baking soda
1/2 teaspoon salt
1 teaspoon cayenne pepper
1 egg
1 pound shrimp, peeled and deveined (you can leave the tails on, I didn't)
3 to 5 cups vegetable or canola oil

Directions

Place all apricot dipping sauce ingredients in a blender or food processor. Blend until smooth. Reserve.

In a large bowl, combine flour, beer, lime juice, baking soda, salt, cayenne, and egg. Beat until it is smooth. Add a bit more flour or beer, if necessary, so that the batter has the consistency of pancake batter.

Pat shrimp dry so the batter will stick.

Pour oil into a small, tall pot until it is 3 inches deep. Heat oil until it reaches 350 degrees F, BE CAREFUL!

While oil is heating, dip each shrimp into the batter, then dredge into the coconut shreds so that the entire shrimp is covered in coconut shreds (minus the tail, if you are keeping it).

When oil is ready, submerge 4 shrimp at a time into oil. Fry for approximately 1 minute, or until coconut is a golden brown, rotating once or twice. Remove and place on paper towel to absorb excess oil.

Skim any wayward coconut shreds from the oil. Adjust heat so that it is 350 degrees F again and continue with next batch.

Serve with apricot dipping sauce.

Live, Laugh, Love, & Enjoy!

Tuesday, September 28, 2010

Refried Beans

Ok, so I don't have a picture for this one but consider it a bonus! I am writing this in lieu of my cousin Sarah's comment on Beans Beans... regarding the everlasting question, do refried beans have lard in them??? Honestly it really depends on who you talk to!

The Rosarita beans you find in the grocery store do not, they are more a mashed beans than refried beans. I love them, grew up eating them and I make a delicious layer dip with them, but you will find they are not what you can get from a restaurant...

So that leads to the question, then how can I make them???

First, cook your own beans. Not only will they taste better, they are less expensive and don't have the funny taste canned ones can have. Refer to my previous post about beans for how-to.

Second, find a fat you prefer to use. My suggestions would include, lard* (yes lard), corn oil, canola oil, and light olive oil. I make my beans with canola or corn oil but it really is up to your taste preference and the type of bean you are using... If you are going with a pinto, I would suggest either lard or canola, black beans can use light olive oil or canola nicely and white beans, just about anything!

Third, over a medium heat, heat up about 1 tablespoon to 3 tablespoons (depending on amount of beans, I tend to use very little and add more if I need to) in a skillet.

Fourth, while fat is heating up, drain beans but reserve the liquid, you will use it in a bit...

Fifth, add beans to skillet, be careful, they may pop at you!

Sixth, stir beans in the fat and let them get "dried out" and tender.

Seventh, once tender, start to mash. They should be tender enough that you can do this with a spoon or what ever you are using to mix them...

Eighth, once all mashed slowly add some of the liquid you reserved to the mash and combine. Continue to add until they are a bit runny, then slowly let the liquid evaporate by simmering until you are happy with the consistency.

So to answer your question Sarah, to make the beans you will find in a restaurant, use pinto beans with lard. But to make more traditional beans from Mexico, use a small amount of light oil and enjoy the flavors of the beans, not the lard!

*Be cautious when using bacon fat/lard. It tends to be salty and if you have already salted your beans then it might make for a bad idea...

Live, Laugh, Love & Enjoy!

Goals

As you may or may not know, this blog was intended to be a foodie blog but I feel I have been slacking a little on this and for that I am sorry. So my goal is to post at least two recipes, with pictures, a week. I know this seems crazy but I think I can do it!

So what to post for today? Well, tonight I am making chicken enchiladas so maybe something related to that? I guess we'll see :)

Live, Laugh, Love!

Monday, September 27, 2010

Beans Beans...

As you may know, JL's parents are from Mexico, thus making beans a main staple in their household. In fact, JL's mom arises early just to make her pot of beans so they are ready for consumption the next few days. Funny...

Beans are very healthy and can be incredibly inexpensive if you use dried beans, otherwise, it may seem a little pricey to some.

My favorites include black, white northern and pinto. I am not a fan of kidney or garbanzo (which I don't think is actually a bean but anyway...)

This recipe I will share with you can be adapted to any type of bean you like. I typically use this for the white variety but you can use it for pinto, black or any other/combination (JL's mom like to mix pinto and white) you prefer.

Best Basic Beans Ever!

1 Cup dried beans
A pot of water
1 clove of garlic
1/2 small onion cut in large pieces
Salt

- Rinse beans and remove any "funny-Looking" ones.

- Add to pot of water and let sit for a few hours, or overnight.

- Place pot of water & beans on stove and add onion and garlic.

- Simmer on low for about three hours or until tender.

- Add salt to taste, cooking beans with salt can make them tough so I add it at the end.

You can freeze them in small batches for each meal or use them all, great to use as refried beans or just wrapped in a warm tortilla with some queso fresco!

Live, Laugh, Love & Enjoy!

Thursday, September 23, 2010

German Chocolate Cake

Birthdays are my excuse to try out a new recipe for cakes and this one for, my co-worker, Kurt is no exception. A few weeks ago we were talking about my cake making and all of a sudden he said, "I loooooove cake!" I laughed and said, "what kind?" The conversation went from there and I soon found out that he was more a cake lover than a frosting lover.

As you know there are four different types of people, in regards to cake, the cake lover, the frosting lover, the all over lover and the non-lover (weird people). He apparently was a cake lover. This continued the conversation to see if he has even had real frosting, not the kind that is premade and is just thrown on the grocery store cakes but the buttery rich, yet not overly sweet, taste of homemade frosting. He said, "uh.. no." Hmm.. I thought, can there really be people out there who have never had the joy of tasting frosting from a beater? Sad :(

The conversation continued on to say that one cake he really liked was one his grandmother made for him when he was little, a German Chocolate Cake. It's interesting because he happens to be half German but this cake actually isn't from Germany at all, rather England by a guy named Sam German, from England. The actual name for this cake is German's Chocolate Cake and was altered with time.

Since I haven't made a German Chocolate Cake from scratch before I decided this was the time! I have been making cakes from scratch for a while now so I knew it wouldn't be very difficult... Just needed to find a recipe...

There are a plethora of terrific cake recipes out there, for this specific cake, but I prefer to use cocoa powder, weird I know, but I just do. I feel like it is the real way to do things, the traditional way. Surprisingly the amount of recipes using cocoa powder, versus the newer German chocolate by Baker's, was more difficult but I found it!

So on to the pics...


As you can see I also used a basic chocolate butter cream to frost the sides and decorate, I think just using te coconut pecan topping for the sides is just too much, it adds a nice contrast.


And now the recipe...

Just click HERE!

Hush... a little secret... I didn't make the coconut pecan frosting... Why? It is a little difficult and I honestly think the one at the store is just as delicious and much easier than the one I would have made.

Live, Laugh, Love & Enjoy!

Friday, September 17, 2010

Food buzz

It is official, I am now a food blogger :)

A lot of people are competing right now to be The Next Food Blog Star, next year I may give it a try but we'll see.

I am currently working on trying to find the best Tres Leches Cake. If you are unsure what this is, here is a bit about this dessert...

It is a Mexican staple at most celebrations. In fact, it would almost be considered weird to not have it. Some think this dessert is from Nicaragua, and they may be correct, but I think the version I am focused on is a traditional Mexican dessert. My best explanation of this cake is that it is a white cake soaked in sweet milk. It has a bread pudding-like consistency but is served chilled. It really tastes a lot like flan, since it has a heavy egg base. Typically it is topped with whip cream or meringue. My theory is the meringue is the Nicaraguan roots and the whip cream is the Mexican, but again, just my theory :)


This may seem like a simple cake. Just a white cake with sweet milk but it is incredibly deceptive... First, the egg whites need to be whipped stiff, and the yolks creamed until light. Then the wet is gently folded into the dry until just combined.

From all the cakes I have tried at JL's family and friend's parties, I have to say, unless it's homemade or from a quality bakery, it just isn't worth trying. Typical issues with this cake are:
- The cake (or pan) isn't right. They either use a regular white cake, not the right flavor, or it is simply too crumbly.
- The cake sits way too long. I would say 9 out of 10 times I have had this cake the sweet milk is all collected on the bottom and the top is almost dry. This is from it sitting way too long or the cake consistency isn't right to hold onto the milk. Either way, not good...
- Since most bakeries are focused on the ease and expense of the ingredients, most of the time the frosting is gross. As stated before, the frosting is supposed to be a simple whipped cream or meringue (I have yet to try) but usually they put a whipped frosting or something that just tastes like it is made of chemicals. I don't know if this is because a mix is used or if they are concerned that the frosting won't stay put if left out of the fridge. Either way yuck!

So as you can see the challenges are many but I figure if I can tackle this cake, then I can do anything! Lol, maybe not anything but any cake that is!

Live, Laugh, Love!