Thursday, December 16, 2010

Holiday Baking - Family Favorite Sugar Cookies

I am finally feeling the holiday spirit and last night enjoyed making these yummy cookies!  This is a recipe I have adapted out of an old edition of the Joy of Cooking cookbook.

Growing up that was our cooking bible.  Every time my mom or I wanted a recipe for something we ran to the cupboard and grabbed this cookbook.  I remember one time I wanted to make some extra money while we had a garage sale so I sold lemonade and cookies, surprising I know...  These cookies were the ones I made and they were such a hit I sold out before the sale was over! 

Don't let the oil distract you, they are incredibly buttery tasting and the oil only makes it that much easier.  I used canola oil but vegetable would work well.  Don't use an oil with flavor, like olive or peanut.

Quick Sugar Cookies with Oil
adapted from a recipe in Joy of Cooking

2 1/2 cups flour
1 1/2 tsp baking powder
3/4 tsp salt
1/4 tsp nutmeg
1/4 tsp ground clove
1 cup white sugar
3/4 cup cooking oil
2 eggs
1 tsp vanilla
Sugar (sprinkles or turbinado sugar is best)
  • Preheat oven to 375 degrees.
  • Combine the flour, baking powder, salt & spices.
  • In separate bowl, mix together sugar, oil, eggs and vanilla until smooth.
  • Add flour to oil mix in parts, combining well after each addition.
  • Scoop out 1 inch balls and place on parchment lined baking sheet.
  • Press a flat bottomed cup into dough to moisten, then dip into sugar and flatten cookies with it.  It will leave sugar on to and if it sticks, that just means you need to add more sugar to your plate so it will stick.
  • Bake for 10 to 12 minutes, until edges just start to turn color.
Another cookie recipe I LOVE and Kyarah has asked about is the for Chocolate Gooey Butter Cookies.  They are so delish, incredibly easy, and by Paula Deen so don't even think they aren't bad for you!

Live, Laugh, Love & Enjoy!

Monday, December 6, 2010

Hectic Time

As of now, I am not sure how much I will be posting this month, recipe wise.  I hope to be able to keep up but right now I am going through some things at work and I am trying to quelm a bit of anxiety that seems to be taking up much of my focus.  Sorry to all of my readers, all three of you, but I shall get to posting soon!

Live, Laugh, Love!

Thursday, December 2, 2010

It has passed...

I honestly think I was disappointed in myself this year in regards to Thanksgiving dinner.  Everyone was happy with my wares but I feel I could have done so much better.  It could have been because I was mentally on vacation.  I took about 11 days off and didn't do much, loved it!  I will take it up a notch for Christmas, for sure!

I was also disappointed in myself for not taking a picture of the turkey but I was majorly stressing at that point to get all the food on the table that I guess I just disregarded it.  We had a traditional meal but no sweet potatoes, which was the biggest mistake.  I think maybe that was why I felt like I was missing something.  I won't be doing that again... 

Overall the turkey was yummy (but ready too early), the ham was delish (yeah we have both...), the mashed potatoes were fluffy, the green bean casserole was creamy, the mac n cheese was super, the cranberry sauce was fabulous, the gravy was ok (I really prefer fresh turkey gravy but didn't make it since the stressing was getting to me...), the rolls were warm, the stuffing wasn't that great (and I LOVE stuffing...), the pumpkin pie was good (but took way too long to bake), and spending time as a family was terrific.  So I guess overall it was good, just not as I have had in the past, miss my Mom's cooking but next year I shall do better!

Sorry for the short hiatus but I shall get back to clogging soon and I am thinking of doing a theme, maybe just start with A and see where it takes me... 

Live, Laugh, Love!

Wednesday, November 17, 2010

Cochinita Pibil - Say what???

In order to be more creative in the kitchen I figure its about time I roll up my sleeves and start thinking Mexican.  For those who know me, you may think this an odd statement, seeing how JL is Mexican and would assume I am already doing this, but alas no.  The sole reason being that I wouldn't want to compete with his mother or other excellent cooks in his family.  Silly as it sounds trying to cook something new can be intimidating and then having something fabulous to compare my cooking to...  well you get the idea.  JL thinks it is silly. 

I have referenced Simply Recipes before but I really love the blog, really.  Elise cooks some Tex-Mex stuff and some authentic Mexican dishes too.   Not only that but she cooks other delicious recipes I seem to always want to try, maybe its the photos...  Anyway, you have to check it out. 

Back to my rant...  So in order for me to start this journey I found a recipe for Chochinita Pibil on Elise's site and decided why not?  It looked pretty easy, just needed a special Mexican ingredient, and a long time to cook.  Bonus: JL had never tried it!!!  Not only that but a cousin of a friend has tried it and she said it was good, so I jumped... And it was definitely worth it!!! 

I would highly suggest this for any cook, so incredibly easy and super delicious, please try it and don't be wary of its origin!

Cochinita Pibil Recipe

Some of my suggestions:
  • Steam a couple of chile de arbols (or other spicy red chile) and toss in the blender with the marinade.  We thought it needed a kick but still delish. 
  • Cook it in a Crock Pot for 5-7 hours on high (depending on how much you are making)
  • This recipe will feed four, without much leftovers, so we doubled the recipe, had some friends over and had some for lunch the next day.  It is delish the next day.
  • Definitely shred the meat and mix in some of the broth before serving.
  • Serve with Lime-Cilantro rice, Elise has a recipe for it linked to the Cochinita Pibil recipe.
  • We also had some avocado with it :)
Sorry for no photo but I just can't compete with Elise :)

Live, Laugh, Love & Enjoy!

Tuesday, November 9, 2010

Herbed Butter for Roast Chicken

Again, we are having Roast Chicken for dinner and I can't wait.  Not only are we having it for dinner tonight, but we will have the leftovers for tomorrow in sandwich and cheesy enchilada form :)

If you are looking for an easy herbed butter to slide under the skin of chicken or turkey this season, this is it.  All the seasonings are included and no need to sprinkle or rub chicken, unless you want a little extra salt. 

1/2 stick butter, softened
1/2 tsp salt (or less if you plan on massaging the bird in it)
2 tbsp fresh oregano, chopped fine
2 tbsp fresh rosemary, chopped fine
1/2 tsp black pepper
1/2 tsp garlic powder, or one to two cloves of garlic chopped fine
1/2 tsp onion powder

Combine the ingredients together and stuff under the skin of the chicken.

If you want to use this for turkey, double or triple the recipe, depending on the size of the turkey.

Some more helpful tips...

For a crispy skin, you don't need to add oil, just dry it out in the fridge for a few hours before roasting it and it will come out nice and brown and crispy.  Typically I let JL indulge in that part...

For a quicker cooking bird, don't stuff it, with anything. 

Contrary to Martha, tying a bird will increase it's density, thus making the cooking time a bit longer as well.  I do prefer to tie up my Thanksgiving Turkey but will consider not doing that this year just to prevent the breasts from drying out.

Don't cook Roast Chicken with the foil on.  It will only steam the meat and not let it roast.  Many people think this will help keep the moisture in but the skin does a great job of that on its own and if you cover it, you will end up with soggy chicken skin, ewww....

I found that brushing the butter on top of the skin only allows for it to melt and run off, in order to keep the flavors and allow for the infused herbs to flavor the meat, put the butter under the skin in a solid form and as the chicken roasts, the butter will melt into the meat of the chicken...  yummy!

Live, Laugh, Love & Enjoy!

Monday, November 8, 2010

Best Ribs Ever!

It is time for me to share our secret recipe for the best baby back ribs ever.  Are you ready?  The secret is Newcastle!  Yup, you heard right...

1 rack of baby back ribs
1 bottle of Newcastle
Sweet Baby Ray's BBQ Sauce
Pork Spice Rub (optional)

Preheat oven to 350 degrees.

Cut up rib rack into two to four pieces, depending on how many each person wants, it also will allow for the ribs to fit nicely in a 13 x 9 inch pan.

Pour entire beer bottle over ribs and bake in oven for 1.5 to 2 hours, until ribs are tender. You can test them with a fork.

Heat up grill to medium to high heat.

Coat ribs with BBQ Sauce and place on grill.  Turn once the sauce has caramelized and you can add another coat, depending on how much sauce you want, we like tons!

If you want to add the spice rub for more depth of flavor, coat the meat before you coat with beer.

Live, Laugh, Love & Enjoy!

This post was not sponsored by Sweet Baby Ray's or Newcastle.

Friday, November 5, 2010

Contemplation

As you may or may not know, I am on a bit of a diet...  That phrase might have been a little understated but I don't want you all to think I have gone mad and won't be able to post any more delicious recipes because my new goal is how to make healthy delicious, or give lots of goodies to my friends and family.  It will be my new challenge and I am totally up for it! 

Jose has been on a healthy spree for the past 5 weeks and so I figured it was my turn to hop on that bandwagon.  Almost two weeks in and so far I have lost four pounds and I am in my craving stage.  If you aren't familiar with dieting or forget what its like (so jealous of you!) then usually within weeks two through six, the dieter typically will start craving everything and anything that may have been favorites or just ok but are now banned, until things get under control.  What am I craving today?  Buffalo wings... the craziest thing is that previously I just thought they were "ok", that is until I couldn't have them :/  Oh well, two more months of this and as long as I continue to work out I can have 'em again! 

You may think I am crazy for trying this around the holiday season and I know, it is crazy.  Timing was just right so I thought, why not?  Also, the Real Age web site has been bugging me and I realized that I don't feel my age, but I was starting to look it.  If you know my family, you will know that I have been gifted to be a part of a genetic chain that doesn't age very quickly, thanks Grandma Jo Hanna and Grandpa Wes!  If you were to meet my uncle you would not guess his age, I would bet $20 on it.  He has more energy than I do and he is twice my age.  Check out: Real Age and see for yourself how old your body really is...  I went form 27.5, prediet and exercise, to 22.5, yesterday.  Now I know 27 is my real age but who honestly wants their body to be aging at the rate or a little faster than their real age?

So give it a try, it takes a few minutes but gives helpful tips and advice on how to make your body younger and your life span longer!

Live, Laugh, Love!

Wednesday, November 3, 2010

Cream Puff Cups

Hello all!  Recently I have been in the competitive spirit.  As you may or may not know, I "heart" Paula Deen!  I think her cooking is real American and I love that she loves butter just like me!  In fact I think using olive oil in place of it can be horrendous and I'd rather have nothing at all...  Just my thought :)

I frequent Paula's website and have been noticing the ad from Philadelphia Cream Cheese about a contest for recipes.  Since I was young, haven't entered a contest, mainly because I am afraid of losing, silly I know.  So I decided to make a leap for it.

This happens to be the last week for this competition and each week has a specific theme.  This week's theme is Desserts - Make To Impress.  I thought that maybe I could do this but wasn't sure what to enter.  I decided to review the other entries, my competition, and see if it was even worth it.  You can view the other entries here.

Many of you may think I entered a cake, but no I didn't :)  It is a make to impress and I can only use ten ingredients or less.  You would be surprised at how hard that can be.  My entry was at exactly ten ingredients and I could of had more but I adjusted.  This recipe was inspired by one of my favorite bloggers, The Girl Who Ate Everything and her Strawberry Cream Puff Cake, however, mine is definitely different.

Cream Puff Cup


6 oz Philadelphia Cream Cheese
1 cup powdered sugar
½ tsp vanilla extract
1 cup heavy whipping cream
1 tsp grated orange zest
2 sheets frozen puff pastry, thawed
1 egg
1 tbsp water
16 strawberries
8 sprigs of mint for garnish

1. Preheat oven to 400 degrees

2. Lay out puff pastry sheets and cut into four six-inch squares, it doesn’t have to be exact.

3. Lay each square over cup in muffin tin and work into the cup. There will be about one to two inches of edging.

4. Combine egg and water and whisk until combined to make egg wash.

5. Brush pastry top with egg wash.

6. Bake in the oven for 15 to 20 minutes or until the edges are a deep golden brown and puffed up.

7. Remove from muffin tin and let cool.

8. Combine Philadelphia Cream Cheese, sugar and vanilla and beat until smooth in appearance.

9. Add whipping cream and beat until stiff peaks form.

10. Fold in the orange zest until combined, don’t over mix, and set aside.

11. Slice strawberries in four and reserve the middle two slices for garnish.

12. Wash and dry mint sprigs, clip off the end bunch of about four or six leaves, whichever you prefer for decoration.

13. Fill a pastry bag or Ziploc bag with the cream cheese mixture and pipe into the cooled pastry cups.

14. Garnish with the strawberries and mint bunches.

Note: The parts of this can be prepared in advance but do not fill the pastry cups until a couple hours prior serving; otherwise the pastry won’t be as crisp.

Live, Laugh, Love & Enjoy! (And wish me luck!)

Saturday, October 30, 2010

Halloween Treats

Being on a budget can make things difficult for my creativity but then I realize, it is only a challenge and I can make it happen!  So for our pumpkin carving party I decided to make sugar cookies, since we also have ample amounts of candy for all to pick at.  I really like the sugar cookies that come in the gift baskets but I think sometimes they can be a bit dry.  I tried this new recipe and I love it and so did JL who claims to "not be into sweets".  He can deny it all he wants but when I make a really good dessert he just can't seem to help himself :)


Sugar Cookies (like the gift basket ones)
Sadly I don't know where I got this from but thank you!


1/2 C + 6 T butter, I used salted
3 C + 3 T all purpose flour
1 C superfine sugar, you can toss some regular sugar into a food processor to make it superfine
1 large egg
1 t vanilla

  • Cream together butter, sugar and vanilla, just until it is creamy, don't over mix!
  • Beat in egg until well combined.
  • Add flour until a non-sticky dough forms.
  • Knead and separate into two portions.  
  • Roll out in between two pieces of parchment or wax paper and let cool in the fridge for 15 to 20 minutes, until firm.
  • Remove from fridge and cut into desired shapes.
  • Bake in the oven at 350 degrees for 10 to 15 minutes on a parchment lined cookies sheet.
  • Slide paper off of sheet and let coo before removing them.


Frosting
Adapted from All Recipes, Submitted by JB BOX

1 C powdered sugar
2 t milk
2 t light corn syrup
1/4 t vanilla extract
food coloring

  • Combine all but food coloring and separate into desired portions for coloring.
  • Wait until cookies have cooled before frosting.


Live, Laugh, Love & Enjoy!

Tuesday, October 26, 2010

Chipotle Chicken

When trying to get creative with the ever-so-boring chicken, utilizing new or unknown ingredients can be the only way to go.  Chipotle Chilies are smoked Jalapenos and delicious in almost anything, even mixed with sour cream for a creamy salad dressing.  As spicy as jalapenos can be, the smoking of them can reduce the bite a little bit.  The Adobo sauce they are combined with, typically, in the can is deliciously sweet and can balance out the spicy-ness, leaving the smoky jalapeno delectably savory and edible for this gringa (white girl)!  If you like heat but never tried chipotle chilis, taste it and add as many as you want to the marinade.  I didn't blend the ingredients but thinking back, that might have been a great idea!

Yummy Chipotle Chicken that you can use for tacos, burritos or salad.

Chipotle Chicken
Adapted from Simply Recipies

2 chicken breasts sliced in half or pounded
2 chipotle chilis, diced
Sauce from chipotle chilis
2 T lime juice
1 T canola oil
Sprinkle of salt

Marinate chicken in chilis, juice, oil & salt for 30 minutes to 1 day.

Grill chicken until done.


As you can see below, I make American tacos, versus the typical Mexican taco with onion, cilantro and salsa.
Live, Laugh, Love & Enjoy!

Wednesday, October 20, 2010

It is just beginning!

The past few months I have been making cakes for friends, and their family or friends.  There was one period where I was making cakes every Saturday. 

Jose and I have been discussing this and the opportunity that has become available to me/us...  and Nessa's Cakes was born.  I don't take any credit for the name, that was all Jose! 

It is still incredibly preliminary and very under the radar so I have created a blog to give my potential clients a place to see my handy work and have a list of options available to them, from me :)  The pricing of the cakes is based on the actual cost of the ingredients for me.  This isn't a for-profit undertaking, in any way...

Long story short, here it is... http://nessascakes.blogspot.com/

Live, Laugh, Love & Enjoy!

Tuesday, October 19, 2010

The best easy cake recipe ever!

I am going to share a secret with you... Some of the cakes I make are not entirely from scratch... I know, I know, it is preposterous and a shame but to be honest, most bakeries no longer make things from scratch at all. Not to mention, I have tried so many recipes from scratch but the best ones I have made require a box mix to use as a base.

This past weekend I had to make 40 cupcakes and a two layer 10" cake. It was a lot of work but the crazy thing was, I was able to finish it all in three hours, from start to finish! Even though I was using a box cake mix, the additional ingredients is enough to almost consider it a recipe from scratch.


The request was for chocolate and not too chocolaty (crazy, I know) cake/cupcake. So I decided to use this recipe from Our Best Bites.

Previously, I made the recipe for a friend and everyone loved it, including me :) I decided, why not try it with chocolate cake mix, instead of vanilla, for a not-too-chocolaty chocolate cupcake/cake. I decided to go with a vanilla butter cream frosting and for the cake I added a strawberry filling.

Needless to say, the cupcakes were a hit and I honestly think they were better than anything else I have made to date. They were super moist, surprisingly since cupcakes are hard to get moist, and they all had a dome top! I thought adding the extra flour and sugar would take away some of the chocolate but they were still pretty chocolaty.

The conversion for a chocolate cupcake is to use Devils Food box cake mix and instead of eggs whites you can substitute 3 large eggs. I don't like to waste eggs and since the only reason the recipe calls for whites is to keep the cake white, I didn't see the necessity.

To get a dome top on the cupcake, preheat oven to 400 degrees and right after you put the cupcakes in the oven and the oven comes back to temp, reduce the temp to 350. This may be a little annoying but it is soo worth it!

Live, Laugh, Love & Enjoy

Wednesday, October 13, 2010

Planning Ahead

This is not a food post but something very related to food and a normal person's active lifestyle.

I was inspired by Tina to share this with you...

About two weeks ago Jose and I decided, enough is enough. We are no longer going to be eating out during the week and will leave it to once a week, maybe. I then created a system to help the deciding of meals an easier task. This system I will share with you, you lucky person you!

First I created a weekly meal plan.

Monday: Fun meals (to make Monday seem less boring)
Tuesday: Home-cookin’
Wednesday: Mexican
Thursday: Italian
Friday: Home-cookin’
Saturday: Slowcooker/BBQ
Sunday: TBD (usually visit the "in-laws")

Then I started to brainstorm. I created a separate list for each type of meal and vowed to come up with at least eight meals for each. This meant that I would have at least 40 meals to make and as you may assume, I exceeded that.

Once that was done the rest of it was so easy and, may I say, enjoyable! All I had to do was decide which meal for each day and create a list.

Below are some ideas you can use for the meal types.

Fun food:
Chinese Appetizers
Tuna Melts
Bacon Wrapped Hot Dogs
Buffalo Wings

Home-cookin'
Chicken Pot Pie
Roasted Chicken with Potatoes and Carrots
Cream of Broccoli Soup
BLTT Sandwiches (add turkey)

Italian
Chicken Alfredo
Stuffed Shells
Cajun Fetuchinni (maybe not really Italian but to JL it falls under this category)

Mexican
Chipotle Grilled Chicken Tacos (recipe to come soon)
Enchiladas
Not-Chipotle Burritos
Chili Relleno Casserole

Slow Cooker/BBQ
Burgers
Pot Roast
BBQ Salmon & grilled veggies
BBQ Ribs

Hope this helps you get back into the healthy and more cost efficient way of eating and always enjoy what you put in your mouth!

Live, Laugh, Love!

Wednesday, October 6, 2010

Thanksgiving came early!

Well, not really. It sure smelled like thanksgiving when I was making dinner though! Dinner was roasted chicken with vegetables.


Roast Chicken with veggies

1 whole chicken, minus the neck and insides and rinsed
4 red potatoes, cut in 8 pieces
1 cup carrots
1 onion, roughly cut
8 oz mushrooms, rinsed
2 celery stalks, roughly cut
1/4 c butter, softened
1 t dried thyme
1 t rosemary
Salt & Pepper
Olive Oil
Cooking Spray

1. Preheat oven to 385 degrees.

2. Spray 9x13 roasting pan with cooking spray.

3. Combine butter and spices.

4. Place chicken in pan and run fingers under skin covering the chicken breast and legs.

5. With your hand, spread the butter under the skin and smooth out.

6. Place vegetables along the edges of the chicken.

7. Drizzle lightly with olive oil and sprinkle with salt and pepper.

8. Bake in the oven for 60 to 90 minutes, until the internal temperature has reached 160 degrees.

9. Remove from oven and let sit for 10 minutes to allow for the juices to redistribute.

Live, Laugh, Love & Enjoy!

Thursday, September 30, 2010

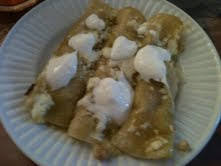
Green Enchiladas

It seems as though I am on a roll! Let's hope it stays this way :)

Enchiladas are one of my favorite foods. When I go to a Mexican restaurant that is usually what I order, they never let me down.

My Mom used to prepare them at least twice a month when I was growing up so they are also one of my comfort foods. She would use the red sauce you can find in a can at the store and cheddar cheese, yummy!

My taste buds developed through the years and I decided to try the green sauce... Delish! Now it is one thing I make once or twice a month for dinner and we both LOVE them! They are great for leftovers and can be made ahead and frozen, just keep the sauce for the top separate otherwise the tortillas will soak it all up.


Again, sorry but still on the hunt for my camera battery charger, I will not give up!

Green Enchiladas
by, Me!

Makes 4 to 6 servings, depending on your hunger :)

24 corn tortillas
2 chicken breasts
1 package of queso fresco (or 3 cups shredded jack cheese)
1 large can of green enchilada sauce
2 small onions, halved & sliced or diced (your preference)
2 T butter
2 t chili powder
1/2 t garlic powder
Salt
Pepper
Corn or canola oil

1. Preheat oven to 350 degrees

2. Combine chili powder, garlic, salt & pepper

3. Place chicken in lightly greased 8x8 or 9x9 pan and coat with spices. Bake chicken for 20 minutes.

4. While chicken is baking, melt butter in skillet and add onions. Saute for 20 minutes or until caramelized.

5. While chicken and onions are working, heat oil in skillet or comal (flat pan with raised edges) until hot. Test it but adding a piece of a tortilla, if it sizzles, you are ready to go.

6. Place tortillas in oil and fry until they puff up but are not crispy, make sure to flip them. Drain off excess oil on paper towels.

7. Once chicken is ready, remove from oven and dice into small pieces. Add them to the onion and about 1/2 cup of the green sauce. Simmer for about five minutes.

8. Set up your assembly area. Remove cheese from package and set chicken skillet on the counter.

9. Grease two 13x9 pans and start rolling the enchiladas. Inside the enchiladas go some cheese and some chicken/onion mix. Make sure and not over do it on the cheese so you can have some for the top.

10. Once all the enchiladas are in the pans, pour the rest of the sauce over them and sprinkle remaining cheese.

11. Place pans in the oven for about 20 minutes or until sauce is bubbly and thick.

12. Remove from oven and let sit for a few minutes.

You are more than welcome to make your own green sauce, but as you can see these are pretty labor intensive so the canned version makes it just a bit easier.

Live, Laugh, Love & Enjoy!

Wednesday, September 29, 2010

Coconut Shrimp with Apricot-Ginger Dipping Sauce

I LOVE coconut shrimp. I really do... When JL and I go out to dinner I usually scan to see if it is available and then see that the price is ridiculous and opt for something less expensive. The real problem is that I know I can make it for a lot less so I think it is ridiculous to spend four times the amount. The recipe I make tastes a lot like the kind from the Yard House but I use a beer batter and they use panko.

I apologize for the quality of the pictures... My Nikon battery charger is MIA so for now I only have my phone camera.


Coconut Shrimp with Apricot-Ginger Dipping Sauce

Adapted from FoodNetwork

Ingredients

Apricot-Ginger Dipping Sauce:
1/2 cup apricot jam
1 tablespoon freshly grated ginger (or 1 t ground ginger)
1 tablespoon Dijon mustard
1/2 jalapeno pepper, seeds discarded, minced
3 tablespoons freshly squeezed lime juice

Coconut Shrimp:
2 cups sweetened shredded coconut
1 cup all-purpose flour
1 cup beer
1 tablespoon freshly squeezed lime juice
3/4 teaspoon baking soda
1/2 teaspoon salt
1 teaspoon cayenne pepper
1 egg
1 pound shrimp, peeled and deveined (you can leave the tails on, I didn't)
3 to 5 cups vegetable or canola oil

Directions

Place all apricot dipping sauce ingredients in a blender or food processor. Blend until smooth. Reserve.

In a large bowl, combine flour, beer, lime juice, baking soda, salt, cayenne, and egg. Beat until it is smooth. Add a bit more flour or beer, if necessary, so that the batter has the consistency of pancake batter.

Pat shrimp dry so the batter will stick.

Pour oil into a small, tall pot until it is 3 inches deep. Heat oil until it reaches 350 degrees F, BE CAREFUL!

While oil is heating, dip each shrimp into the batter, then dredge into the coconut shreds so that the entire shrimp is covered in coconut shreds (minus the tail, if you are keeping it).

When oil is ready, submerge 4 shrimp at a time into oil. Fry for approximately 1 minute, or until coconut is a golden brown, rotating once or twice. Remove and place on paper towel to absorb excess oil.

Skim any wayward coconut shreds from the oil. Adjust heat so that it is 350 degrees F again and continue with next batch.

Serve with apricot dipping sauce.

Live, Laugh, Love, & Enjoy!

Tuesday, September 28, 2010

Refried Beans

Ok, so I don't have a picture for this one but consider it a bonus! I am writing this in lieu of my cousin Sarah's comment on Beans Beans... regarding the everlasting question, do refried beans have lard in them??? Honestly it really depends on who you talk to!

The Rosarita beans you find in the grocery store do not, they are more a mashed beans than refried beans. I love them, grew up eating them and I make a delicious layer dip with them, but you will find they are not what you can get from a restaurant...

So that leads to the question, then how can I make them???

First, cook your own beans. Not only will they taste better, they are less expensive and don't have the funny taste canned ones can have. Refer to my previous post about beans for how-to.

Second, find a fat you prefer to use. My suggestions would include, lard* (yes lard), corn oil, canola oil, and light olive oil. I make my beans with canola or corn oil but it really is up to your taste preference and the type of bean you are using... If you are going with a pinto, I would suggest either lard or canola, black beans can use light olive oil or canola nicely and white beans, just about anything!

Third, over a medium heat, heat up about 1 tablespoon to 3 tablespoons (depending on amount of beans, I tend to use very little and add more if I need to) in a skillet.

Fourth, while fat is heating up, drain beans but reserve the liquid, you will use it in a bit...

Fifth, add beans to skillet, be careful, they may pop at you!

Sixth, stir beans in the fat and let them get "dried out" and tender.

Seventh, once tender, start to mash. They should be tender enough that you can do this with a spoon or what ever you are using to mix them...

Eighth, once all mashed slowly add some of the liquid you reserved to the mash and combine. Continue to add until they are a bit runny, then slowly let the liquid evaporate by simmering until you are happy with the consistency.

So to answer your question Sarah, to make the beans you will find in a restaurant, use pinto beans with lard. But to make more traditional beans from Mexico, use a small amount of light oil and enjoy the flavors of the beans, not the lard!

*Be cautious when using bacon fat/lard. It tends to be salty and if you have already salted your beans then it might make for a bad idea...

Live, Laugh, Love & Enjoy!

Goals

As you may or may not know, this blog was intended to be a foodie blog but I feel I have been slacking a little on this and for that I am sorry. So my goal is to post at least two recipes, with pictures, a week. I know this seems crazy but I think I can do it!

So what to post for today? Well, tonight I am making chicken enchiladas so maybe something related to that? I guess we'll see :)

Live, Laugh, Love!

Monday, September 27, 2010

Beans Beans...

As you may know, JL's parents are from Mexico, thus making beans a main staple in their household. In fact, JL's mom arises early just to make her pot of beans so they are ready for consumption the next few days. Funny...

Beans are very healthy and can be incredibly inexpensive if you use dried beans, otherwise, it may seem a little pricey to some.

My favorites include black, white northern and pinto. I am not a fan of kidney or garbanzo (which I don't think is actually a bean but anyway...)

This recipe I will share with you can be adapted to any type of bean you like. I typically use this for the white variety but you can use it for pinto, black or any other/combination (JL's mom like to mix pinto and white) you prefer.

Best Basic Beans Ever!

1 Cup dried beans
A pot of water
1 clove of garlic
1/2 small onion cut in large pieces
Salt

- Rinse beans and remove any "funny-Looking" ones.

- Add to pot of water and let sit for a few hours, or overnight.

- Place pot of water & beans on stove and add onion and garlic.

- Simmer on low for about three hours or until tender.

- Add salt to taste, cooking beans with salt can make them tough so I add it at the end.

You can freeze them in small batches for each meal or use them all, great to use as refried beans or just wrapped in a warm tortilla with some queso fresco!

Live, Laugh, Love & Enjoy!

Thursday, September 23, 2010

German Chocolate Cake

Birthdays are my excuse to try out a new recipe for cakes and this one for, my co-worker, Kurt is no exception. A few weeks ago we were talking about my cake making and all of a sudden he said, "I loooooove cake!" I laughed and said, "what kind?" The conversation went from there and I soon found out that he was more a cake lover than a frosting lover.

As you know there are four different types of people, in regards to cake, the cake lover, the frosting lover, the all over lover and the non-lover (weird people). He apparently was a cake lover. This continued the conversation to see if he has even had real frosting, not the kind that is premade and is just thrown on the grocery store cakes but the buttery rich, yet not overly sweet, taste of homemade frosting. He said, "uh.. no." Hmm.. I thought, can there really be people out there who have never had the joy of tasting frosting from a beater? Sad :(

The conversation continued on to say that one cake he really liked was one his grandmother made for him when he was little, a German Chocolate Cake. It's interesting because he happens to be half German but this cake actually isn't from Germany at all, rather England by a guy named Sam German, from England. The actual name for this cake is German's Chocolate Cake and was altered with time.

Since I haven't made a German Chocolate Cake from scratch before I decided this was the time! I have been making cakes from scratch for a while now so I knew it wouldn't be very difficult... Just needed to find a recipe...

There are a plethora of terrific cake recipes out there, for this specific cake, but I prefer to use cocoa powder, weird I know, but I just do. I feel like it is the real way to do things, the traditional way. Surprisingly the amount of recipes using cocoa powder, versus the newer German chocolate by Baker's, was more difficult but I found it!

So on to the pics...


As you can see I also used a basic chocolate butter cream to frost the sides and decorate, I think just using te coconut pecan topping for the sides is just too much, it adds a nice contrast.


And now the recipe...

Just click HERE!

Hush... a little secret... I didn't make the coconut pecan frosting... Why? It is a little difficult and I honestly think the one at the store is just as delicious and much easier than the one I would have made.

Live, Laugh, Love & Enjoy!

Friday, September 17, 2010

Food buzz

It is official, I am now a food blogger :)

A lot of people are competing right now to be The Next Food Blog Star, next year I may give it a try but we'll see.

I am currently working on trying to find the best Tres Leches Cake. If you are unsure what this is, here is a bit about this dessert...

It is a Mexican staple at most celebrations. In fact, it would almost be considered weird to not have it. Some think this dessert is from Nicaragua, and they may be correct, but I think the version I am focused on is a traditional Mexican dessert. My best explanation of this cake is that it is a white cake soaked in sweet milk. It has a bread pudding-like consistency but is served chilled. It really tastes a lot like flan, since it has a heavy egg base. Typically it is topped with whip cream or meringue. My theory is the meringue is the Nicaraguan roots and the whip cream is the Mexican, but again, just my theory :)


This may seem like a simple cake. Just a white cake with sweet milk but it is incredibly deceptive... First, the egg whites need to be whipped stiff, and the yolks creamed until light. Then the wet is gently folded into the dry until just combined.

From all the cakes I have tried at JL's family and friend's parties, I have to say, unless it's homemade or from a quality bakery, it just isn't worth trying. Typical issues with this cake are:
- The cake (or pan) isn't right. They either use a regular white cake, not the right flavor, or it is simply too crumbly.
- The cake sits way too long. I would say 9 out of 10 times I have had this cake the sweet milk is all collected on the bottom and the top is almost dry. This is from it sitting way too long or the cake consistency isn't right to hold onto the milk. Either way, not good...
- Since most bakeries are focused on the ease and expense of the ingredients, most of the time the frosting is gross. As stated before, the frosting is supposed to be a simple whipped cream or meringue (I have yet to try) but usually they put a whipped frosting or something that just tastes like it is made of chemicals. I don't know if this is because a mix is used or if they are concerned that the frosting won't stay put if left out of the fridge. Either way yuck!

So as you can see the challenges are many but I figure if I can tackle this cake, then I can do anything! Lol, maybe not anything but any cake that is!

Live, Laugh, Love!

Monday, September 13, 2010

Chocolate Strawberry Cake

Sorry all for the delay. Here is a picture of my latest creation. Drum roll please... :)


Some things I would like to note about it... It was much more difficult that I expected. The strawberries started to leak juice, thus destroying the wonderful finish on this cake and I added too much strawberry filling thus creating a slight bulge in the layers. Other than that, it was great and delish!

I used the Hershey's Chocolate Cake recipe, with some alterations (my secret) and a strawberry filling. The fondant was marshmallow fondant and chocolate marshmallow fondant, both I made from scratch and the most difficult part... In hindsight, next time I would cover in a chocolate butter cream and add the fondant bow to it.

Lessons learned and overall a cute cake!

JL had helped me make the chocolate covered strawberries and since we made some extras, I created this as well!


Live, Laugh, Love & Enjoy!

Wednesday, September 1, 2010

Stouffer's Corner Bistro Review

As I was wandering the grocery store with JL, a rare occasion mind you, I came across an interesting new line by Stouffer's. Being in the save-money-mode for so long I have gotten really tired of Lean Cuisines so I was on the look out for something new and this was it.

I love tomato soup and I am really trying to pretend Fall is already here so what could be better than soup and a melty sandwich? Not much. Although I have had better soup in my life, this really wasn't bad, in fact, I would have it again. The melt is very much like a Hot Pocket and was pretty tasty.

I would definitely get this again for a quick and easy meal but another idea came to light... Why don't I make my own tomato bisque, incredibly cheap to make, and take Hot Pockets in place of the sandwich and spend less money? The meal costs about $4 but on sale it ran me about $3.50. Where as a serving of homemade tomato bisque would cost about $1 and the Hot Pockets are usually two for $2.50, thus totalling my yummy meal at $2.25, saving a whole $1.25 to $1.75. This may not seem like a lot but it sure can add up! Plus, I will then have tomato bisque on hand for dinner if I am too tired to cook! (Brilliance!)

Other soups I want to to try are corn chowder and chicken noodle (I have yet to try a perfected recipe for this...). Any suggestions are welcome!

Live, Laugh, Love & Enjoy!

Stouffer's Corner Bistro Web Site

Monday, August 30, 2010

First Tierd Cake

So this Friday I am going to be delivering my first tiered cake. It is for a friend's birthday party and my gift is a cake, don't act too surprised people!

Since I have yet to have an excuse for a tiered cake I think this is it! I plan on keeping it simple with two tiers.

She has requested chocolate and strawberry but left the rest to me so this is my idea...

Chocolate Devil's Food Cake with strawberry filling for the first layer (12" round). A white cake with strawberry filling for the second, since some people don't like chocolate (silly people) (8" or 9" round). The tiers will be covered in a chocolate fondant (I know Sarah but you need to try MM fondant, it's actually made with marshmallows!) with chocolate covered strawberries lining the edges and accents of red fondant decorations on the sides and top. Since I am new at fondant I am not committing to many decorations until I know it will look ok. I am a perfectionist but I think all my ceramics experience will pay off in this task...

Wish me luck and I will definitely post pictures and recipes after I am done!

Live, Laugh, Love

Thursday, August 26, 2010

Fish Sticks

Who didn't have fish sticks growing up? I know that was always a staple in our freezer and then my uncle would come visit and say how horrible it was to eat fish like that and just last week he made his own fish sticks from fresh fish he brought back from Alaska the day before... you get the idea :)

My love for fish sticks was developed from my youth, regardless of what my uncles thoughts on the matter were, and I will say that even though I agree that fresh fish probably tastes better, here in SoCal, really good fresh fish is pricey. Besides that, I am not about to eat anything that comes out of our coast, they close the beach because of a sewage spill but hey, lets eat what's swimming in it! Really???

So which ones do I like? Well for starters I am not a breaded fish stick indulger. I prefer the battered kind. Why? Well breaded typically uses bread crumbs and I am not a fan of the consistency on fish, since fish is so delicate. I find the breaded are typically crunchier and if that's what you like then fabulous, I just prefer the delicate crisp-ness of the battered fish.

For brands, I really like the Van De Kamp's. They have a few options, such as beer battered or regular battered, halibut vs cod and other flavor varieties. I chose the classic but have been tempted to grab the halibut ones, I presume the fish would be firmer and that might be a good thing.

So you ask, besides Fish sticks with carrots and tater tots, a typical meal when I was young, how can one enjoy fish sticks? Well, here is a few ways you can prepare them and the ones with the star are JL approved :)

- Fish Tacos, just bake them and cut them into slices
- Fish Sandwiches*, great with cheese, lettuce, tomato, tartar sauce on a french roll
- Fish Fillets on a salad
- Fish Burrito (I know, duplicate... kind of)
- Instead of baking them, you can fry them...*
- Stuffed and then baked, just thaw them out for a few minutes first
- Served with fries* :)

As you may know, I am not a fan of the processed salad dressing so you can presume I am not a fan of jarred tarter sauce, unless I am the one making it... Here is an easy way to whip up some tarter sauce for really cheap!

Mayonnaise
Pickles (diced)
Lemon Juice (or Pickle Juice)
Pepper
Paprika
Onion Powder

Combine about 1/2 cup of mayo with a splash of lemon juice.
Add in the pickles, as much as you like.
Add in a dash of pepper & onion powder and two dashes of paprika.
Combine and taste.

As you can see this recipe is a "wing-it" sort of recipe so make sure and taste it and add the flavors you are missing. Paprika gives a bit of a sweetness where the lemon juice gives the tart-ness. I typically don't add salt to this since the pickles are usually pretty salty already but its up to you!

Live, Laugh, Love & Enjoy!

P.S. This heat is not letting me enjoy a fish stick since I can't possibly imagine turning on my oven. At 106 deg it may just cook us all, why use an oven :/

Thursday, August 19, 2010

Pulled pork and lots of wine...

The other evening we had a couple of friends over for some pulled pork sandwiches and wine, lots of wine... I made some coleslaw but it didn't quite turn out the way I wanted it to, a little to tangy, but it was a delicious contrast to the sweet BBQ any way. I used a bit of this and a bit of that, the ingredients are listed below but not sure how much of each I added...

Shredded cabbage
Fresh lime juice
Low fat mayo
Milk
Sugar
BBQ spice rub
Salt

I mixed up the dressing and then added the cabbage. I also had the leftovers the next day and the flavors were more developed and better but I have to say the fresh crispness of the cabbage was refreshing, especially when it is way too hot...

For the pulled pork, I made that a couple days before so I could just shred it and toss it with some carmelized onions and BBQ sauce. I would highly suggest you try and get pork butt since it will be easier to shred and take less time to "fall apart". I used shoulder and needed to be cooked for a loooooonnngggggg time... (Its what was one sale...) I would also advise you to try and use a slow cooker if it is hot.

Live, Laugh, Love & Enjoy!

Wednesday, August 4, 2010

Say what???


Monday JL decided we needed to go to the store and get groceries for the week, in an attempt to save some money we agreed that we need to make dinner at home more often. I love the idea that he wanted to help me, took some of the weight off my shoulders! As we were wandering we had to think of meals, seven of them. I came up with a few and then he throws a curve ball at me... "What about fried chicken with mustard?" I simply replied, "Are you crazy?" I couldn't think that dipping chicken in mustard was an excellent combination but frying it, for me, seemed to just be wrong... Although I was totally aghast at this combination I decided why not? The worst case scenario I would have a can of tomato soup on standby, so I said ok.

Tuesday rolls around and I decide lets get this over with. I had planned on making a vegetable saute with the mustard chicken and thought we should use the veggies while they were still relatively fresh so Tuesday was going to be the day... (Soup was standing by.)

Funny, but it really was as simple as he explained. He took out about 8 drumsticks and covered them with mustard. While he was getting more mustard on his hands than the slimy chicken, he had about 1/2 inch of oil in a large fry pan heating up. Once the oil was hot (on medium heat), but not smoking, he lightly placed all the drumsticks in the pan and walked away... Hmm... I peered at the bright yellow chicken and thought, well I really like mustard so this may not be that bad... Plus, as JL says, "anything fried is delicious!" LOL, not sure about that, but almost everything is better when its fried... Throughout the cooking time we rotated the pieces as they browned so all the sides would be crispy. The cooking time took about 30 minutes.

The review on last night dinner? It was DELICIOUS!!! It didn't taste like mustard at all, it actually resembled the chicken from El Pollo Loco but a little more crispy, which I like better. Yes it was fried but without the breading it really wasn't that unhealthy since it didn't soak up much oil at all. The only thing I might suggest is to let your chicken marinade in the mustard for a little bit or overnight.

We did have this with a vegetable saute but next time I would just try and mimic a meal from El Pollo Loco, with fresh salsa, tortillas, a salad and some spicy pinto beans.

Live, Laugh, Love & Enjoy!

Tuesday, July 27, 2010

Am I really a foodie snob???

This past weekend was a busy one, so much so that I wasn't able to do my weekly grocery shopping (yes, I shop for the whole week in a day...). Yesterday I decided I just needed to figure out what to make and go to the store. This was going to be the week to start to eat healthy and I really wanted to try out some new recipes so I am upping things a notch by including things in my meals I don't normally.

So the story goes...

Yesterday I stopped by the market, not the quick small one but the one that was a little larger and I was hoping would have more selections, I was sadly disappointed. Not only did they have the same things the smaller one did, but I had to walk all over the market a few times just to find what I wanted, or find out they didn't have what I wanted. So you may ask what I was looking for? Well, I wanted more than just one variety of real Parmesan cheese, not the stuff from the container, and blue cheese. Picky I know, but it seems to me that if there isn't more than one option I am forced to buy the one brand they have and I have no choice in the matter. The one thing that threw me off was that they didn't have arborio rice for risotto. Since it isn't a rice at all there was lots of confusion on where it should be. I suppose I will need to start shopping at Henry's or Trader Joe's instead of the local market but those options are a bit farther for me.

To sum it up... As I was roaming the store from end to end multiple times I started to wonder, am I a foodie snob? Do I really need more than one option for blue cheese? Why can't I be ok with Butoni chunk Parmesan cheese? I guess I am but I figure that if I am going to eat something it had better taste good and I guess my palate is getting more refined so my cooking skills and market choice have better rise to the occasion.

After all the running around yesterday I had to go home and make dinner. JL was such a sweetie and he helped me with dinner and washed the dishes, I love him so. For dinner we had BBQ chicken drum sticks with salad. I enjoyed a strawberry blue cheese salad where JL is a traditionalist with his avocado & tomato ranch salad.

Not to go on a tangent but I have also noticed that I don't care for bottled salad dressing, SNOB I know!!! Last night I made this one and it was so yummy, I would suggest you try to whip it up if you can. It will keep for a 2-3 weeks.

Live, Laugh, Love & Enjoy!

Thursday, July 22, 2010

Smore Smores'!!!

The idea of having a Smore is making my mouth water... Some fun alternatives to the tried and true traditional favorite can be fun and much less messy then the original.

Love this idea by SwEEts by e - Bite-Size Smores

Or the one done on Cupcake Wars with a graham cracker crust, chocolate cupcake filling and a whipped meringue. I'm sure you could also use a marshmallow cream whipped to add texture and a blow torch is always a fun aspect...


If you want something refreshing a Smores' Pie is always a good idea. Use a graham cracker crust, spread chocolate ice cream in the crust, freeze for a little bit to firm up the ice cream and top with either large marshmallows cut in half or the whipped marshmallow cream idea (or both...) and again, use a blow torch to give it the effect of a Smore. The only hard part for this one is that you would need to add the marshmallows at the end, before serving, otherwise they would get cold and the whole point of a Smore is the combination of textures and temperatures... Also you would need a torch but they can be found pretty inexpensively at a cooking store. You could also do it the way Amy does it by clicking here, it is an extreme version of my simplified one...

Live, Laugh, Love & Enjoy!!!

Tuesday, July 13, 2010

Peach-Blueberry Cobbler

Sorry it has been a while since I have posted a recipe on the blog but here is a great one for a quick but delicious dessert. What wouldn't be delicious with a whole stick of butter in it?

Sorry about the image quality, iphone...


Cobbler (you can add the fruit you want to)
Derived from Pioneer Woman Berry Cobbler recipe
1 C flour
1 1/2 t baking powder
1/2 t salt
1 1/4 C sugar
1/2 C unslated butter (1 stick), melted
1 C milk (I used 1% and it worked well so any kind will be ok)
2 1/2 C fruit cubed (or whole berries)
Bit of sugar

- Preheat oven to 350 degrees
- Combine dry ingredients and mix
- Add milk and combine
- Add in butter and mix
- Pour into greased dish, either 10" round or other type you have on hand
- Spread fruit over batter
- Sprinkle with sugar
- Bake for 60 to 75 minutes (depending on pan)

For the one I made I added a sprinkle of nutmeg to the batter and used brown sugar to top it instead of white. You can get creative and use apples (soften them first) and add cinnamon to batter and sprinkle with brown sugar or torbindo (sp?) sugar... Let your imagination flow, you can't mess this one up!

JL's Reaction: For not being a sweets guy he liked it, it isn't too sweet since the tartness of the fruit balances it out.

Live, Laugh, Love & Enjoy!

Tuesday, July 6, 2010

We have been busy!

So it has been almost three weeks since my last post and I feel like I have majorly been lagging on the posting... Since my last post I mentioned making a lot of baked goods and I have been continuing on that path since.

Things I have made lately include:
Strawberry Puff Cake
Apricot Jam
Lemon Poppyseed cake with Vanilla Buttercream
Chocolate Chip Cookies

Next on my list:
Chocoalate cake with a Cookies N Cream filling and with this one I am going to try my hand at fondont. I will be amking my own marshmallow fondont which I am told tastes much better than the traditional kind that most bakeries use, so wish me luck :)

Count down 'till the B-Day: 15 days

Live, Laugh, Love!

BTW if anyone wants a recipe for these things just post on the blog and I will add it for you! Sadly today I forgot my baking journal so all the recipes are at home :(

Thursday, June 17, 2010

Hello Lovely...

So, as you may know, I have gotten the bug for baking and the only way I will bake is when I can give it to other people so as not to make it possible for me to eat it all myself. JL isn't a big-on-sweets guy unless it is really good, but I can eat anything whether it is fantastic or just ok (I believe I get that from my Mother who would insist we save the crispy cookies for her).

After my early morning blog reads I realized something, how incredibly wonderful it would be to have a Kitchenaid Mixer! There are multiple recipes I have come across that refer to using one but alas I don't have one... I do, however, have a hand mixer that has done well for now so as you can see this is simply a want sort of thing not a need, as of yet.

Then I came across this mixer, I have seen it in the stores and proceeded to pet it and just stare at it in amazement at how gorgeous it is. (I am not weird, just in love with cooking/baking appliances and utensils.) JL typically wanders off at that point or tells me I am being weird :)

Isn't she lovely???


Some day my lovely you will be mine!

Live, Laugh, Love

Wednesday, June 16, 2010

Hot times call for cool salads!

Sorry it has been a while since I have posted on the blog...

New things going on with us? Not a lot... Jose is now only working one job, which is a good thing but will make money issues even more tight with us. So, sorry to our friends but we will be even more boring now than before :/

I am trying to start up a cake and dessert catering business... Well not really, just doing it for fun. I have a couple of great standby recipes and am attempting more. The only difficulty I run into is the fact that I cannot make cakes all the time because then who will eat them? Me! That would be bad so for now I am making cakes for friends and family for birthdays or celebrations so I can practice the recipes and fine tune them and I can give them a gift that I know they will like :) So far I have made a Strawberry and Cream Cake, Mocha Mousse Filled Vanilla Cake and next up is a Cookies N Cream Cake. As you can see the recipes I have perfected are slim but I'm getting there!

Other than that we have been enjoying our time and trying to stay cool. Last night I couldn't figure out what to make for a side dish that wasn't the same boring thing but then realized I had cucumbers and sweet onion so why not some kind of cucumber salad? I didn't think Jose would like it, he is incredibly picky, but he DID!

Cucumber Salad
1 Cucumber peeled, sliced and halved (to make half-moon shapes)
1/4 to 1/2 sweet onion, sliced and quartered
2-3 T White balsamic vinegar (or white wine vinegar)
1 t sugar
Cajun Seasoning (or dill and salt or dijon mustard)

1. Soak the cucumbers and onions in salt water for about 5 to 10 minutes. This softens the cucumber and onion slightly without having to cook it. Drain and rinse well.

2. Combine the sugar, vinegar and spices and add to veggies.

3. Let sit for a minute or two and serve. I added avocado at the end and it was delicious!

Live, Laugh, Love & Enjoy!

Monday, June 7, 2010

Ready or Not!

The summer heat is here. Bringing to mind the delectable Italian pasta salad as a weekly option for dinner.

Italian Pasta Salad
1/2 box Plus Pasta cooked and cooled
1 carton cherry tomatoes, sliced in half
2 small cans of olives sliced, or you can use kalamata olives here
1 can marinated artichoke hearts cut in small pieces
1/2 small onion, diced
Mozzarella Cheese (to taste)cubed
Parmesan Cheese (to taste)
Italian Dressing (to taste)
Squeeze of lemon, for freshness

Combine all the ingredients and add as much of the cheese and Italian dressing as you would like.

I like to use Newton's Own Lite Italian dressing but if you prefer the full fat version, it is yummy too!

This is a recipe that can be adjusted and the measurements I gave were an estimate, typically I just go with the flow.

Additional ingredients can be broccoli, heirloom tomatoes, mushrooms, peppercinnis (sp?), and avocado.

Tuesday, May 25, 2010

My New Love: Cream Cheese Frosting

Hello all! You can probably tell by this post that I have been bad again, but I can't help myself sometimes...

I love making cupcakes and cakes and anything cake-like! I tend to use the box mix because, let's face it, it is so much easier. The flavors are great, the crumb is soft and moist and it is fool proof, you really can't go wrong. The one thing I like to do though is make my own frosting. I am not too much of a fan of the packaged kind, although I have been known to buy it from time to time because it is easier. The taste of real homemade frosting is delish and it makes it seem as though it was all homemade!

Cream Cheese Frosting

2 parts cream cheese
1 part butter, softened
4 parts powdered sugar (to 5 parts depending on taste preference)
Splash of milk
Splash of vanilla extract

Cream together cream cheese and butter and slowly add sugar until incorporated.

Add milk and vanilla.

Last night these are the measurements I used:
1/4 c butter
1/2 c cream cheese
1 c powdered sugar
1 T milk
I didn't have vanilla but it tasted good without too!

Live, Laugh, Love & Enjoy!

Thursday, May 20, 2010

Vintage Cake Plates

Recently I have found out that I am in love with vintage cake plates. I have a small collection of a few newer replicas but when at the swap meet I find myself taking a gander at the antique spots to see if they have any cake plates. Recently I came across a silver one that was nice but I am trying not to buy up all the cake plates of the world, JL would kill me and insist I find a place for them or he will :)

This is one I found on ebay that I LOVE...


Isn't it incredibly beautiful???

Another fetish I have is for milk glass, so the two combined is almost overwhelming. I find that I am not too much of a fan of the colored ones but I saw a mustard one that I liked and imagined a lemon cream cake perched on top :)


This one is pretty too but might be difficult to slice a cake on it... So pretty :)

For now I am stuck with the two I own but it doesn't hurt to dream right?

Live, Laugh, Love!

Wednesday, May 19, 2010

Simple BBQ Chicken Sandwiches

This is a dish I kinda stumbled upon. A few months ago I was typing up some of my family's old recipes and I noticed how back in the day people tended to use bacon fat to cook things instead of olive oil or vegetable oil. This got me to thinking, were they on to something? Has the fear of saturated fats gotten in the way of incredibly delicious foods? I think so in this case :)

This dish I make about every other week because it is so incredibly simple and we always have bacon and BBQ sauce on hand. This can be made in a slow cooker if that is easier for you but the other day I just precooked the chicken in the morning while is was getting ready for work and it was ready for me to use when I got home, making this dish one of the fastest meals I have in my repertoire.

Simple BBQ Chicken Sandwiches

2 chicken breasts precooked (or cut into pieces to add to a slow cooker)
4 strips of bacon
1 small sweet onion diced
1/2 t black pepper
1/2 c BBQ Sauce of choice
Buns or rolls
Cheese of your choice, we like cheddar or American

1. Cook bacon in a skillet on the stove until crispy and remove from grease.
2. Add onion to bacon grease and saute until starting to brown. If your bacon lets off a lot of grease you can drain some of it out but the brown bits are what really give it extra flavor.
3. Add shredded chicken to onion and cook until heated up. I have, when in a pinch, added diced uncooked chicken at this point and it turned out well too. You really can't go wrong with this one.
4. Dice bacon and once chicken is heated through, or cooked, add the bacon.
5. Add the BBQ Sauce and stir. Allow for the mixture to simmer for a minute or two to let off some of the moisture.
6. Scoop onto warmed or toasted buns and top with shredded cheese.
*If you do decide to use a slow cooker, about 4 hours on high and you should have a gloppy mess of deliciousness.

I serve these with the traditional tater tots and I try to add some veggies in there like a salad... Not that JL even gets to that :)

Live, Laugh, Love & Enjoy!

Friday, May 14, 2010

I love rhubarb in the spring time!

Hello all, I am finally getting over this horrible sickness! Yesterday I went to the doctor because my ear was acting up and turns out I have a hole in my ear drum... hmmm... so now fully medicated, as if I wasn't before, I am feeling better and ready to tackle the world! I don't know if you can recall the last time you were really sick but when I started to feel better I just felt like I had so much to do and I wanted to do all of it. Not only that but I am waking up at 6am without any trouble and ready to take on the day. Weird. I am definitely not complaining though, I love being able to wake up and get ready slowly in the morning.

So what's up with the rhubarb? I bought a few pounds of it the other day and finally got around to writing about it and feeling well enough to actually prepare it :)


Rhubarb is an interesting plant, a vegetable but typically turned into a dessert. Probably the only vegetable I can honestly say I love on ice cream. So how is it prepared? With lots of sugar! I don't have a recipe for this per say, I typically just wing it when I make it but I'm sure there are recipes out there, I recall something in the Joy of Cooking. Besides just putting it on ice cream, because I am incredibly impatient and don't want to bother with pie crusts, you can make it into a pie. If you are feeling like you want to liven it up even more you can add strawberries. I did that the other night, before the sickness, and JL thought there was too many flavors going on, so maybe better for a pie idea.

So what to do... I wash and cut the rhubarb into pieces about 1/4 inch thin by about 1/2 inch wide, but it's up to you. Then I add some sugar and just a pinch of water (I know you can't pinch water but seriously, its just a little tiny bit since the rhubarb will let off its own juice). I put this mixture into a sauce pan and on med to low heat I cook it until the rhubarb is tender and falling apart. Some people like to feel the texture of the rhubarb so if you are one of those people, just cook it a little less, if you are like me and like it really tender then wait a bit longer, I know it's hard to do. Make sure a taste it before you serve it, rhubarb is pretty tart so you may need to add more sugar.

I like to serve it warm over ice cream but you can let it cool completely first, up to you.

Live, Laugh, Love & Enjoy!

Wednesday, May 12, 2010

False Alarm!

For the past few days I have been really sick, not the I-can-get-up-and-go-to-work-but-don't-want-to-kind but the am-I-dieing? kind. JL has been sick as well although I think I got it first and passed it along to him, we share everything right? :)

The false alarm refers to the in-laws moving in. Not to say it was a good or bad thing, just they aren't moving in yet. Maybe it was all the stress that allowed for my body to be weakend enough for me to get sick IDK, but I do know that I am feeling crappy and just want to sleep, so by y'all!

Monday, May 3, 2010

Things will be changing soon!

Happy Monday All!

We found out rather recently that JL's parents will be moving in soon, with his younger sister, and this will be a huge relief for JL and I. Not only will we be saving a substantial amount of money on rent and bills, I will have help to clean the house and cook. I love cooking, you all know that, but it's kinda nice to have someone cook for me for a change. Now I will be able to be more experimental with my recipes because if something goes wrong, there is a back up option, other than tacos from Jack in the Box.

This will be something hard for us since we are used to being on our own but I figure if I just focus on the positive and come to the realization that this is no longer just our house now, it will all be ok.

I can imagine the occasional upset but overall, I have our room and my space and that is all I need, not to mention a hefty amount of shopping money now at my finger tips! This will also allow us to get a gym membership again and I can guess I will be spending lots of time there too, losing weight and saving money... not sounding bad at all :)

So recipe... recipe... Sadly I didn't do a lot of cooking this past weekend but I did try out some Banana Wheat Oatmeal Cookies that turned out ok... I will be trying to make them into energy bites so the recipe will be on hold until I get it just right.

But if you have an urge to bake then try some of my favorites from Paula Deen herself, I always say you can't go wrong with Paula!

http://www.foodnetwork.com/recipes/paula-deen/chocolate-gooey-butter-cookies-recipe/index.html

Live, Laugh, Love & Enjoy!

Wednesday, April 28, 2010

Happy Birthday Mom!


Today my mother would have turned 48. It is a hard time but I have the strength and support of JL and our families to help me get through this time.

For all of those who still have their Mom in their lives, tell her that you love her, you never know when you will wish you had one more chance to say it.

Sorry for the sad post...

My Mom was such a wonderful and happy person. Always going out of her way to help people and animals. She always said to enjoy life and I honestly believe that the only person who can make you happy is yourself, so SMILE :)

"Let go, let God." - Her constant advice to me :)

Live, Laugh, Love & Pray


Her resting place, isn't it beautiful?

Tuesday, April 27, 2010

The Shindig...

So this past weekend JL and I hosted yet another gathering at our house and I personally think this was the best one yet. All the food was perfect and everyone had fun laughing and hanging out.

So we had decided on making a few new items as well as some old tried and true favorites.

Layered Bean Dip
Spinach & Artichoke Cheese Dip
Fruit Salad
Pizza Rolls
BBQ Ribs
Potato Salad
PB Cup Brownies
Mini Funfetti Cupcakes

Most of those I made by scratch, all but the cupcakes and potato salad (I know, probably one of the easiest things to make on the list...), and this was time consuming!

Below I will list the recipes on some of the dishes I did make and I hope you will try them out!

Pizza Rolls
2 cans pizza dough (Pillsbury)
8 oz mozzarella cheese cubed into 48 pieces
1 pouch of peperoni
1/4 c olive oil
1 tsp Italian seasoning
Parmesan cheese, to sprinkle on top
Pizza sauce for dipping

Preheat oven to 400 degrees.

Roll out dough rectangle and cut into 24 squares, you will need to do this for the second can of pizza dough once you run out of dough from this one.

In each square, wrap a cube of cheese and a piece of pepperoni.

Place seam side down in a greased 9x13 pan. The sides of the rolls should touch. Continue until you have used up all the dough.

Combine oil and seasoning in a bowl and brush on top of the rolls. Sprinkle with Parmesan cheese.

Bake for 16 to 24 minutes.


BBQ Ribs
1 rack of baby back ribs
1 dark beer, I use Newcastle
BBQ sauce

Preheat oven to 300 degrees.

In a 9x13 pan lay the rack meaty side down, you can also cut it into pieces before this process to make it easier (I did this for the party to allow for people to grab just the amount they wanted).

Pour the beer over the ribs and place in the oven. Bake for 2 hours or until the meat is tender, test with a fork.

Once they are done, place rack, or pieces, on the BBQ and brush sauce over them. Allow for sauce to caramelize a bit on the ribs and flip. Since the meat is cooked through, you are just trying to add the flavor of the sauce to the ribs, so you will have to judge when they are done.


PB Cup Brownies - Recipe Courtesy of Jessica from How Sweet It Is (the link to her site is on the left)

Brownies

1 stick unsalted butter
2-3 squares baking chocolate
2 cups sugar
2 eggs
1 cup flour
1 teaspoon vanilla
1 cup chocolate chips

Preheat oven to 350.

Melt butter and baking squares in a microwave safe bowl. In the mixing bowl, cream melted butter and chocolate mixture. Add in sugar and vanilla and beat until fluffy, about 2-3 minutes. Add in eggs, beating one at a time. Add flour and stir just until combined. Fold in chocolate chips.

Pour into greased muffin tin. Bake for 18 to 25 minutes, or until just barely done. Cool before frosting.

Peanut Butter Frosting (Recipe was adjusted from original)

3/4 stick butter, softened
1 cup creamy peanut butter
1 pound powdered sugar
1 teaspoon vanilla
1-2 tablespoons milk

Cream butter and peanut butter together. Gradually add in powdered sugar and vanilla. Add milk 1 tablespoon at a time. If frosting is too thick, add more milk. If it is too thin, add more sugar.

Frost brownies once they have cooled.


Live, Laugh, Love & Enjoy!

Friday, April 23, 2010

My 100th Post

Sorry for the delay in the posts. The past week has been an interesting and emotional one. To begin, I have no idea why I have been feeling this way. Sunday I went to bed with a bad headache and so Monday I woke up with one. For the remainder of the week, including today, I have had a dull pain in my head that I have been ignoring, simply because I am way too busy at work to try and do anything about it. Advil didn't help, but caffeine seems to. I was putting an ice pack on my head and that seemed to help, until it started to get cold. This is all something I can deal with, what I have a problem with is when I get grumpy for no apparent reason, thus making JL grumpy because he has to put up with it... Sorry baby...

The positive part of this is that I now feel like I am out of my gloomy fog and headed in a better direction. My thinking is, I am not having enough calories. I tend to get emotional when I am hungry so why would this time be any different?

So what is on the horizon for me? A dinner party tomorrow night! Yay, I love having people over and I LOVE making food for everyone. I want to make food that people will enjoy but will be easy to eat... Trying to think up ideas that JL won't shoot down. He says, "why not just burgers?"... humpf... That wouldn't be fun, plus I have made burgers quite a few times for our friends and don't want to just have that again. This time we are thinking of something new and creative! I'll just have to battle him on it. I swear, if he had his way we would just be eating meat patties on a bun with cheese and potato chips, men...

So far I found some fun ideas:
Pizza Bites (using Pillsbury pizza dough and stuffing with peperoni and cheese, with a marinara sauce on the side for dipping)
BBQ Chicken pizza bites (not sure if we should try this one yet...)
Spinach Artichoke Dip (love! but might have to invest in a small crock pot, thus making this one a maybe)
Mini Italian Cream Cake cupcakes (maybe, I need a mini muffin pan)
Some sort of cheesy dip :)

And that's about all I have for now. Today we are going shopping so I need to decide now... I guess I will have to start looking for inspiration :)

Live, Laugh, Love & Enjoy!

A special thank you to my Grandmother Jo Hanna for giving me the Food Network Magazine, I'm in LOVE! I have found so many great ideas for recipes. Thank you Grams :)